Ginger Azure DevOps ALM Integration
Introduction
Ginger comes with seamless integration with ALM Azure DevOps, and this document comes to explain how to use the integration functionalities.
Current supported functionalities are:
- Export Ginger Business Flow to Azure DevOps
- Import Test plans from Azure DevOps to Ginger
- Publish execution result to Azure DevOps
- Open Automatic Defect on Azure DevOps
Pre-requisite
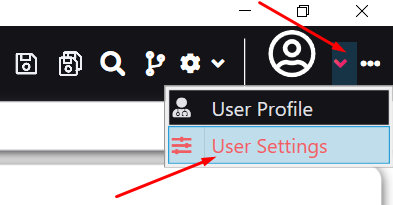
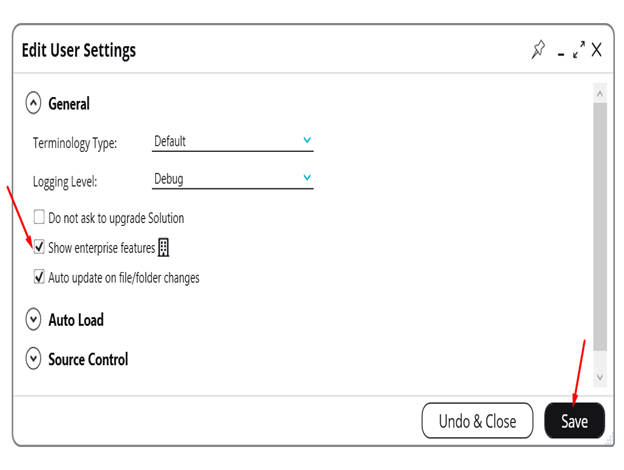
- Ensure 'Show enterprise feature' is selected & saved in Ginger under 'Users Settings option'
Connect Ginger to Azure DevOps
To set ALM connecting details in the Ginger application please follow below steps:
- Click on the ‘Share Operations’ button.

- Select "ALM Connection Settings”
- Select ALM type – Azure DevOps using the radio buttons
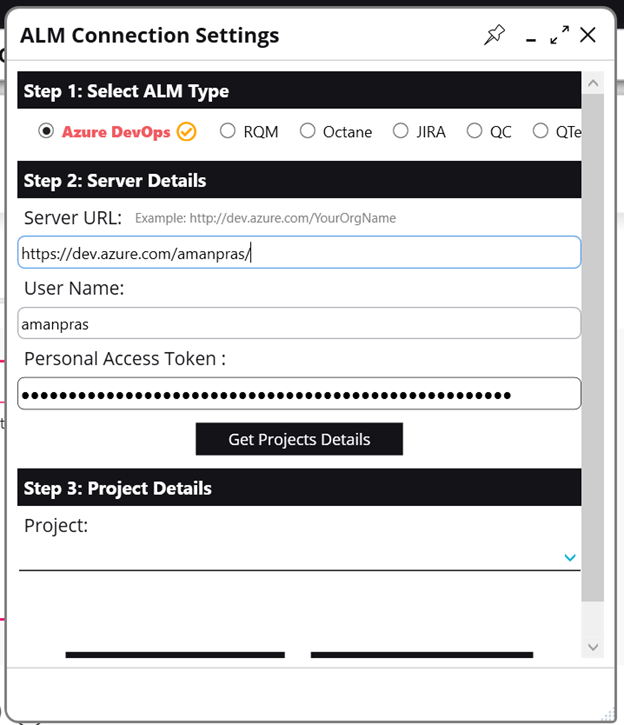
- Populate the ALM server URL and your ALM user name and Personal Access Token and click on “Get Projects Details”
- ALM Server URL – It will be your Azure’s organization url.
- ALM Username – It will be the username of the user
- Personal Access Token - You can use a personal access token (PAT) as an alternate password to authenticate into Azure DevOps. You can click here to know more about it and how to create your personal access token.
- If connection details are correct, projects details will be received, select project and click “Save Project Mapping”
- Note: All Ginger – ALM interaction will try to use saved ALM configuration in Ginger, If in any case the saved configurations are incorrect or Ginger could not establish a connection to ALM, the "ALM Connection Settings” page will be shown and the user will need to enter/re-enter ALM configurations and test them before continuing.
Configure ALM Items Fields
Ginger allows configuring the ALM Test Case and Test Set items fields’ value to be updated when doing export from Ginger to ALM.
For configuring the items fields values:
- Click on the "ALM Items Fields Configuration” button from the “Share Options” menu.

- Click on the “Refresh” button (near the search) to refresh ALM Items Fields Configurations from ALM.
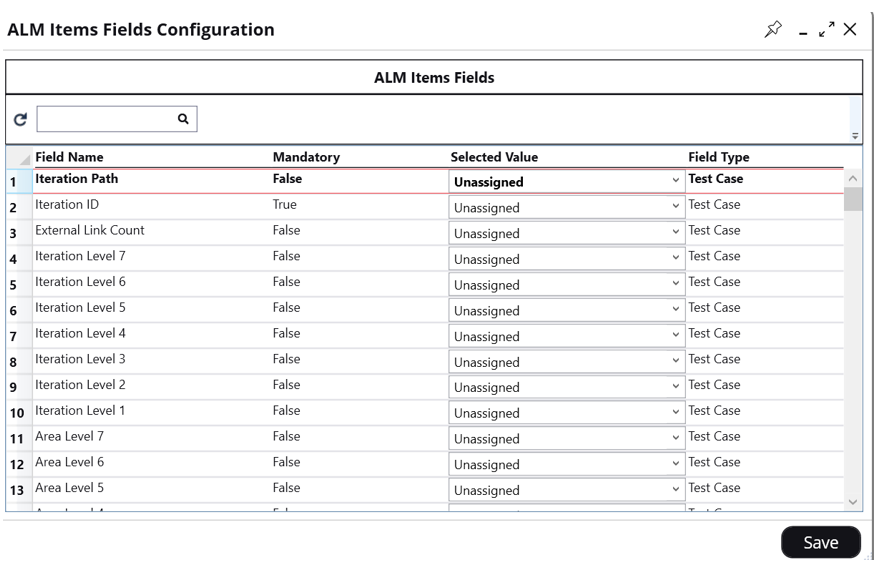
- Select a value from the list or set the value (in case of the free text field) in the “Selected Value” column
- Click on the Mandatory column to sort by Mandatory values so that you do not miss any mandatory fields.
- Click on the “Save” button to save the configurations.
Mapping of Ginger entities with Azure DevOps
Mapping of entities of Ginger with respect to Azure DevOps are as follows:
Business Flow => Test Plan/Suite
Activities Group => Test Case
Activities => Test Steps
Export Business Flow to ALM
Ginger allows exporting a Ginger Business Flow to ALM
- Export Activities Groups to ALM Test Cases- each one of the exported Business Flow Activities Groups will be exported to an ALM Test Case item in ALM Test Plan
- All of the created ALM Test Cases from step 1 will be added to the Business Flow to represent the execution flow
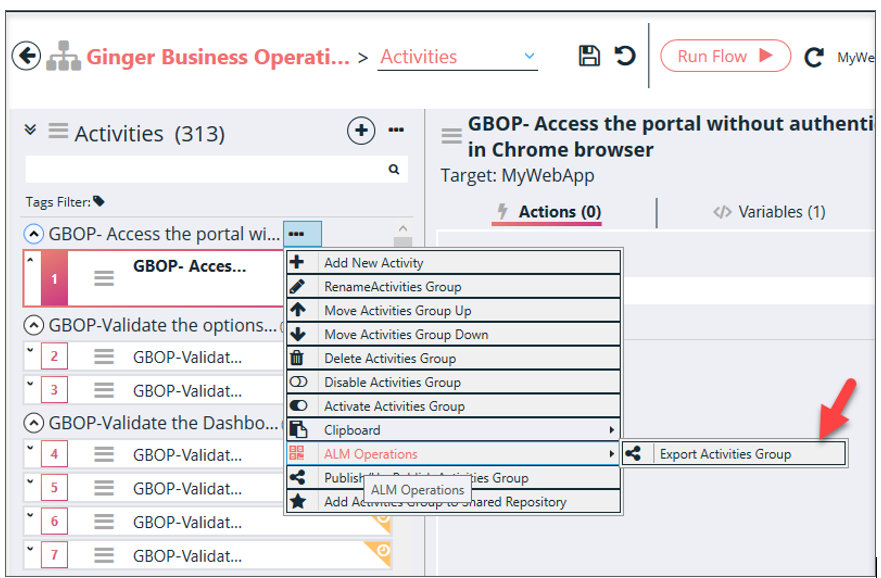
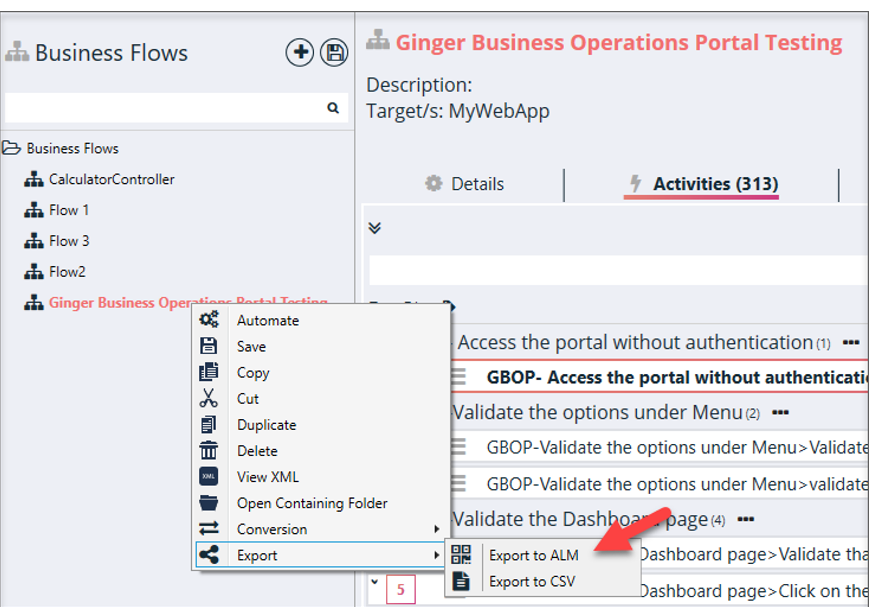
- Right-click the Business Flows to export and select the “Export to ALM" option. It will export the selected Business Flow to the Azure
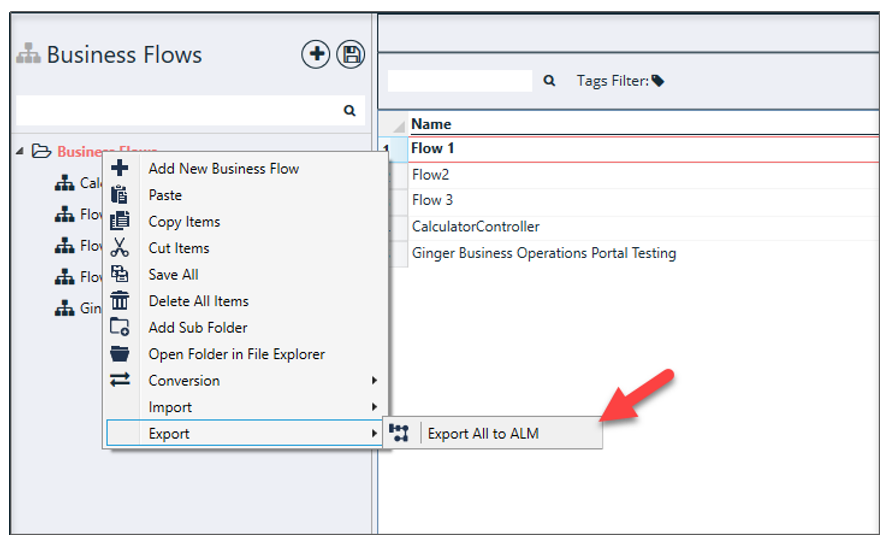
- Right-click the Business Flows to export and select the “Export All to ALM" option. It will export all the Business Flows of the solution to the ALM.
- After exported then a Successful message is displayed

- Refresh the ALM. Users will able to the exported item in the ALM
Export Execution Results to ALM
In case the executed Ginger Business Flow was originally imported from ALM Test Set or it was exported to ALM Test Set then the user can export the execution results to ALM.
Exporting execution results to ALM from Automate tab
- Load the relevant Ginger Business Flow into Automate tab
- Run the Ginger Test Set in “Run Flow” mode.
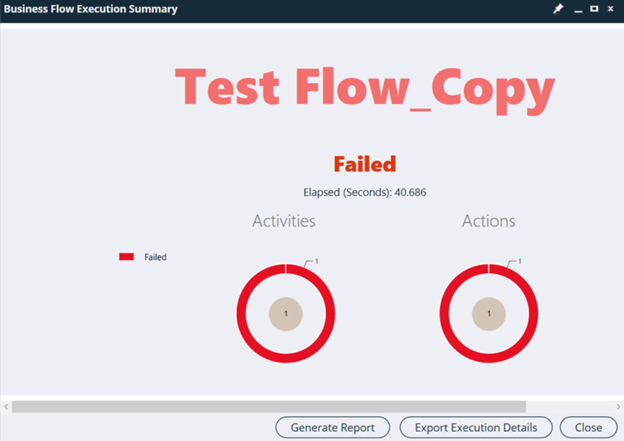
- Once execution is done the user will get the “Test Set Execution Summary” window with a summary of the execution results.
- For exporting the results to ALM user can click on “Export Execution Details”
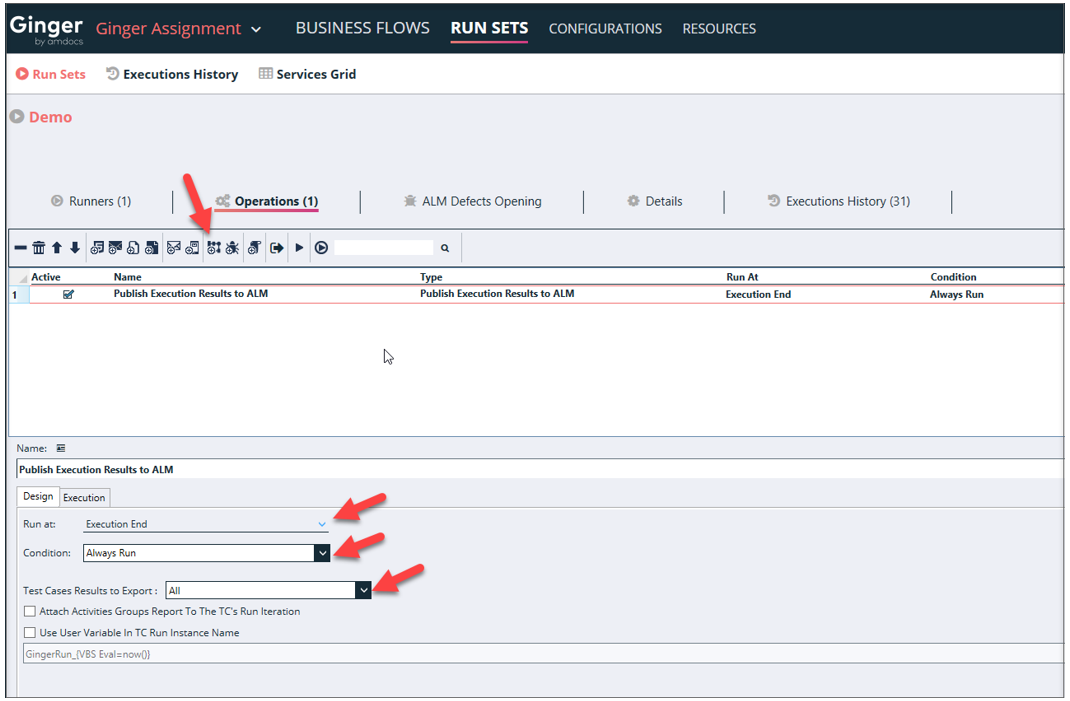
Exporting execution results to ALM from Runset tab
- Open Run Set tab
- Add Ginger Set and drag & drop Ginger Business Flows to it
- Click on the Run Set Configurations button
- Add new “Add Publish Execution Result to ALM Operation” Run set Action
- Click on the Run button
- Execution details will be exported to ALM according to Run Set configurations
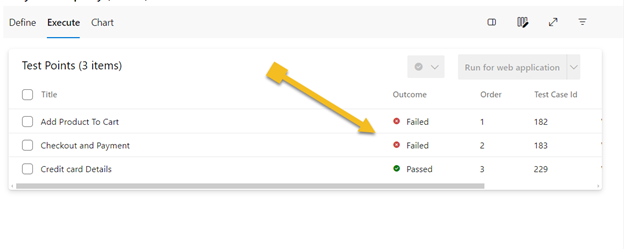
You can now see the result on Azure DevOps as passed or failed.
Open Automatic Defect on Azure DevOps
Setting the ALM Defect’s Profiles
- To have an automated defect’s opening or to make a “manual” opening via ginger much faster, defects field’s values (from ALM) should be pre-selected.
- For this purpose, a screen, "ALM Defect’s Profiles” is available under the ALM drop-down of Solution tab.

- At the top part of a screen will be presented a list of existed Defect’s Profiles – in a grid form. At the grid’s toolbox will be presented next buttons/controls:
- Create/Edit a Profile
- Delete a Profile
- Search Profile by Name/Description
- The grid will show the list of profiles and contain below columns
- Name
- Description
- ALM Type
- Is Default – a column that will be single-selectable per all values in the rows
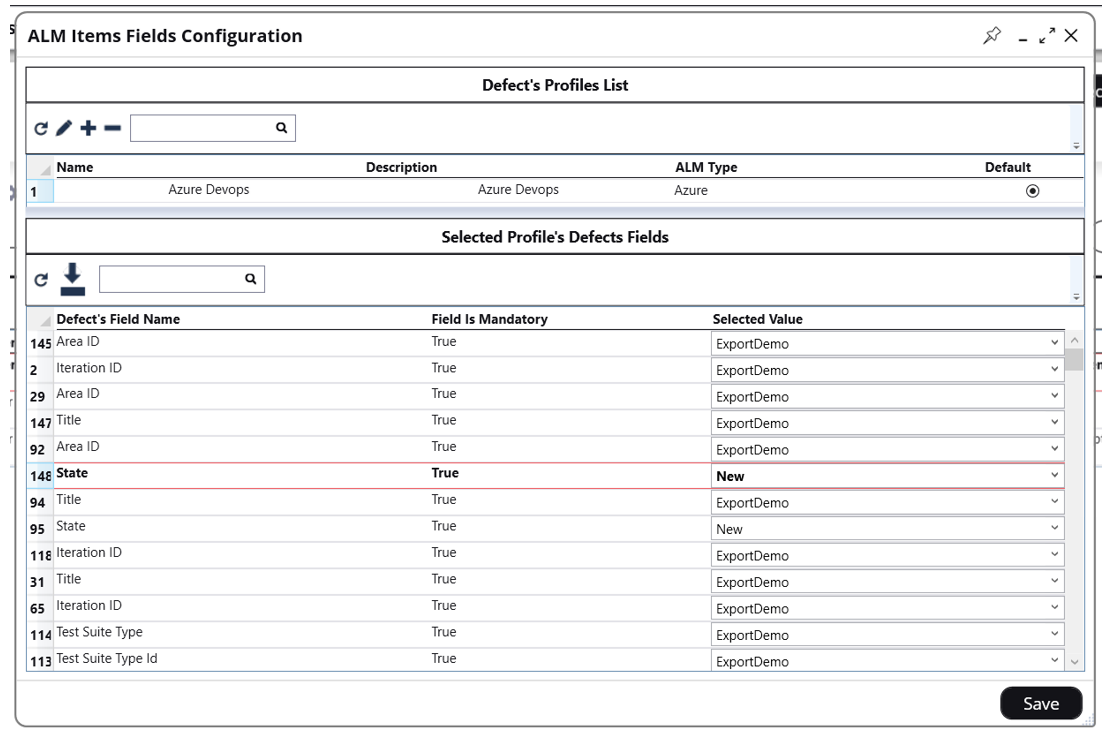
- Once Profile created/selected – Profile’s Fields grid became enabled and populated by fields and their values. Those fields/values will be retrieved from the ALM by the new REST API.Profile’s Fields grid will have below columns:
- Filed Name
- Mandatory – can be sorted by clicking on it
- Selected Values – dropdown with current field’s values list. The value that presented will be the selected one for this profile
- Deselecting (selecting other) of a Profile will be not available till all mandatory field values will not be selected (value deferent than “N/A”).
- Closing of a current window also will be not available till all mandatory field values will not be selected. A warning message will be popped in case that is not expected.
- Closing of a current window will be not available till at least one Profile will be created/exist. A warning message will be popped in case that is not expected.
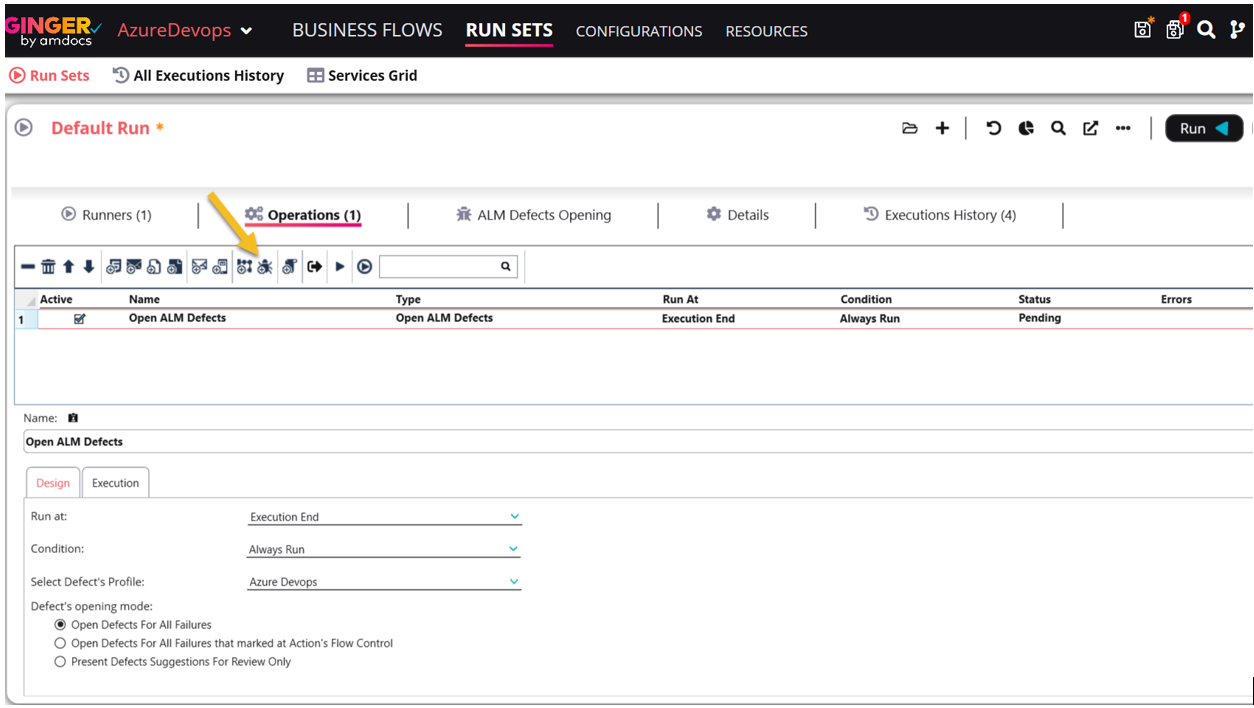
How to automate the opening of Defects?
- In the Run tab, click on “RunSet” and open the desired run set. Operations and click the button to add the operation “Automated ALM Defect’s Opening"
- This operation can be added only when at least one “Defect’s Profiles” exists. A warning message will be popped in case that is no “Defect’s Profiles” are existing yet.
- To use the operation’s functionality, the operation should be added to the “RunSet Operations” list (as usual operation’s behavior).
How to view opened automated defects?
- Go to the Runset tab and click on the “ALM Defect’s Opening” tab.
- This tab presents all the failures that happened during the execution - with all relevant data and screenshots.
- Till the execution’s end, this tab is disabled. Once execution finished the tab became enabled.
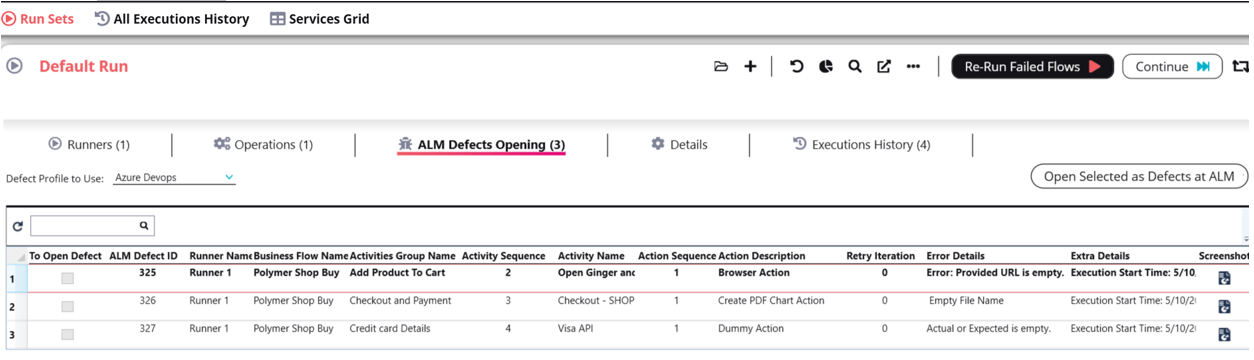
- In case of operation “Automated ALM Defect’s Opening” was in use during the last execution (or it’s not the first iteration of defect’s “manual”opening) column “ALM’s defect ID” will be populated per concerted issue. ALM Defect ID will be saved per action at the “RunSet” object
- In the above grid at the right corner, click on the “Open Selected as Defects at ALM” button.
- This button is enabled only if at least one issue in a grid has no defect for itself.
- Once clicked – this will open for selected issues defects in ALM.
- If ALM connectivity is not working correctly – a warning message will be popped and action will be aborted. Otherwise, defects will be opened in ALM with values per field as at currently selected “Defect’s Profile”.
- The defect will be opened in a below-described way (the same way is relevant for the opening of defects with operation “Automated ALM Defect’s Opening”):
- Naming convention: <<BusinessFlow>>_<<Activity>>_<<Action>>_”Failed”
- Defect description - should copy the steps of the test that was run. Example:
- BusinessFlow Name (failed)
- Activity Group Name
- Activity Group Name (failed)
- Activity
- Activity (failed)
- Action
- Action (failed)
- Variables of failed entities (of all levels) also will be added to the description
- Defect’s Attachment - screenshot will be attached to the defect, showing the error.