Working with Shared Repository in Ginger
Introduction
A shared repository is a centralized repository within Ginger for sharing Variables/Actions/Activities/Activities Groups across one or more Business flows present in the solution. Sharing ensures the re-usability of the components and reduces the mean time to maintain the Automation.
In GINGER the smallest unit of re-usability is an Action.
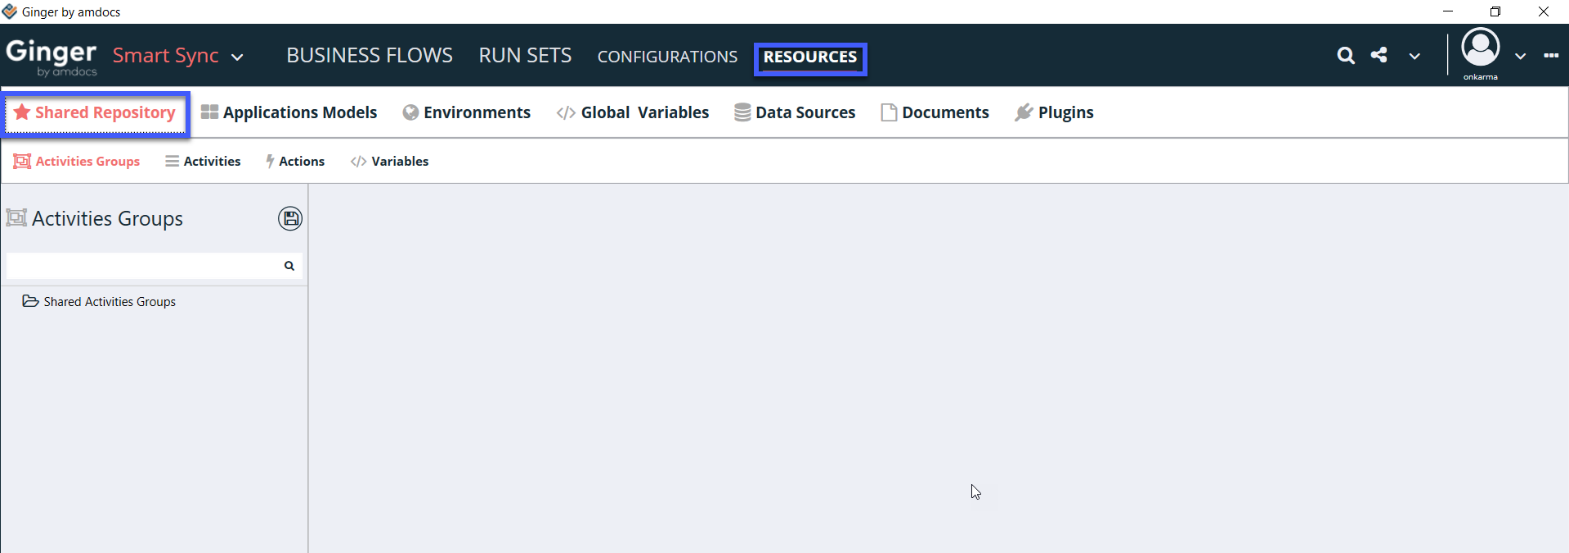
View Shared Repository
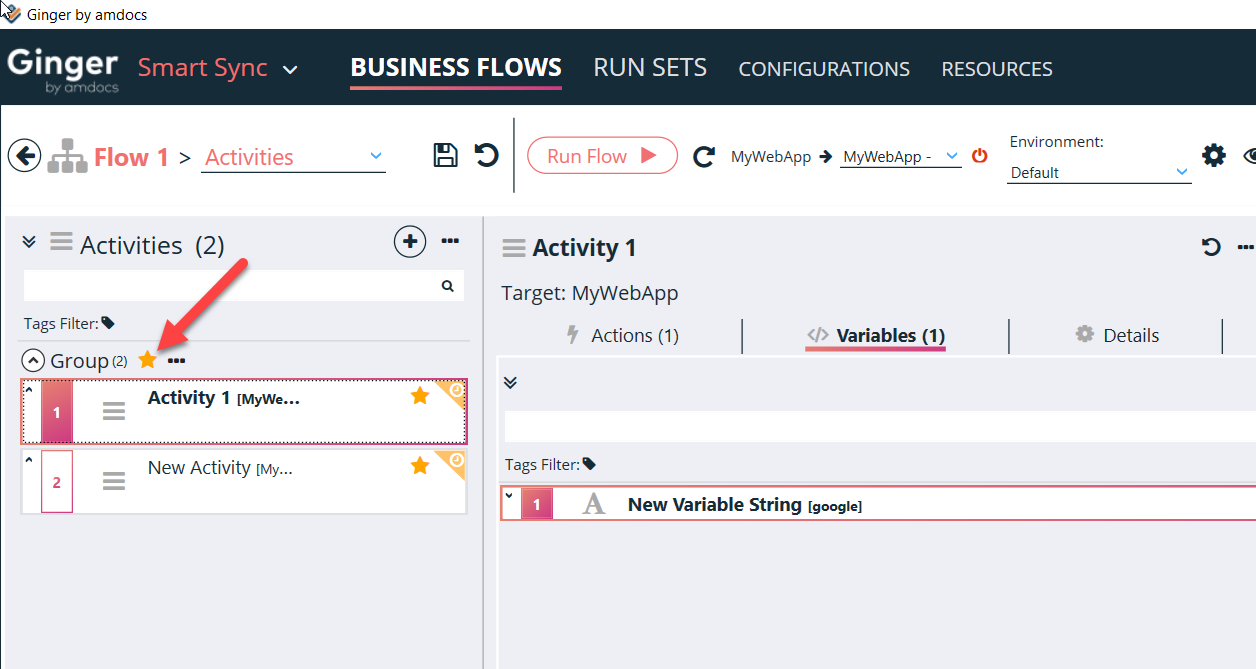
- Shared Repository is visible in the automation area by double-clicking on the desired Business Flow
- Click on that arrow (+) shown below
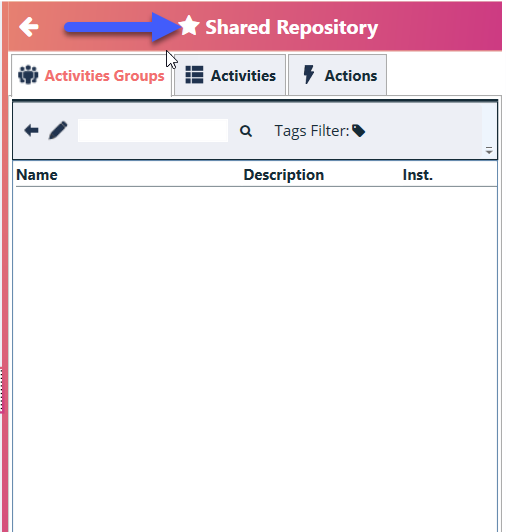
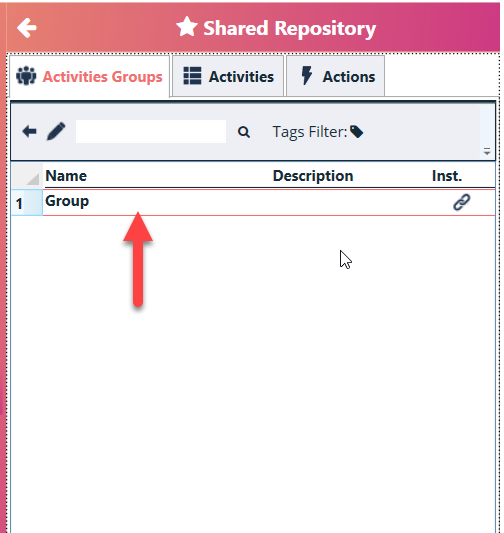
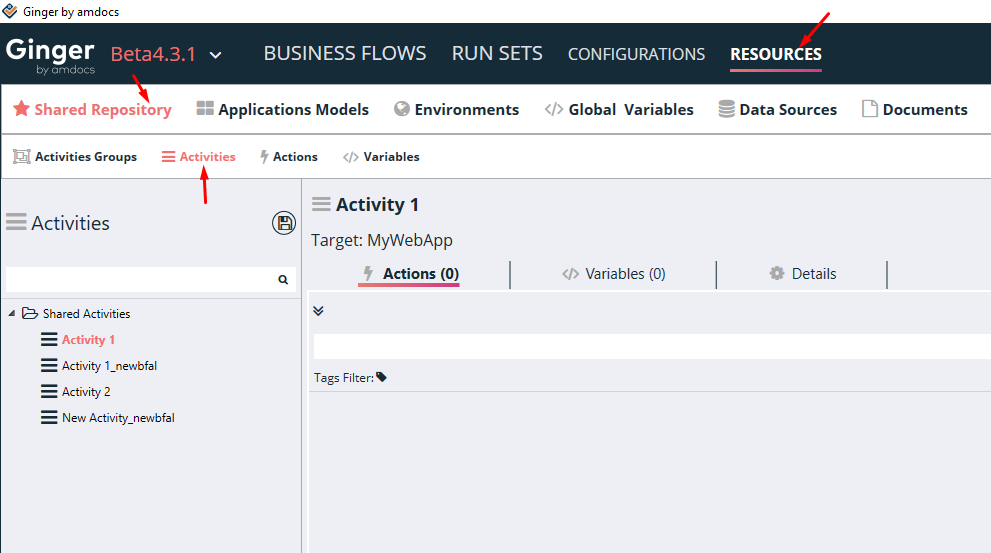
- Shared Repository is also available in the Resources tab as shown below
Upload Activity to Shared Repository as Linked Instance
Uploading Activity as Linked instance is the new and recommended option. This is recently added in version 4.3 or above
Linked instance keeps only the reference to the stored repository on the Business flows. And Actual Activity data is fetched from shared repository in real time making the business flows more light weight.
To Upload Activity as Link,
- Double click on Business Flow in the Business Flows tab.
- All activities will be listed down for that business flow.
- Go to Specific Activity section
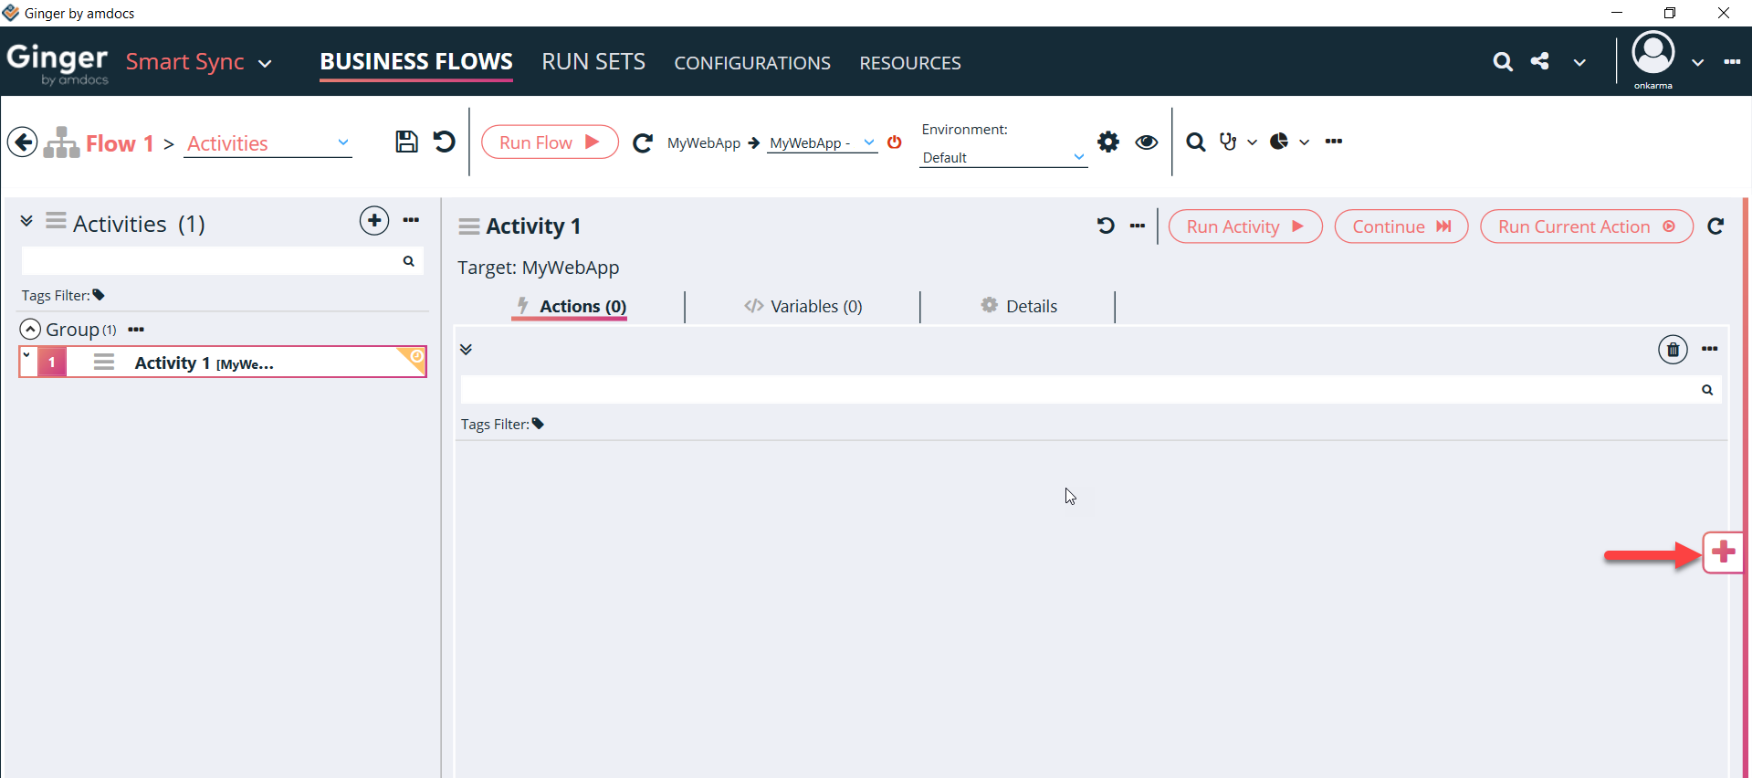
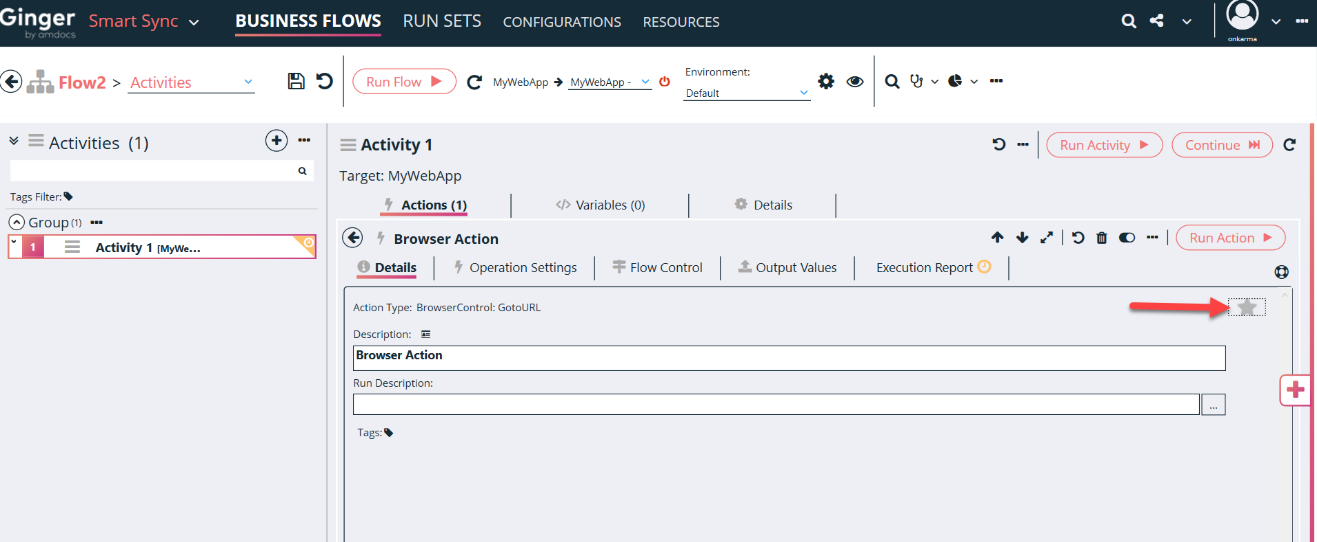
- Click on Add to Shared Repository shown below
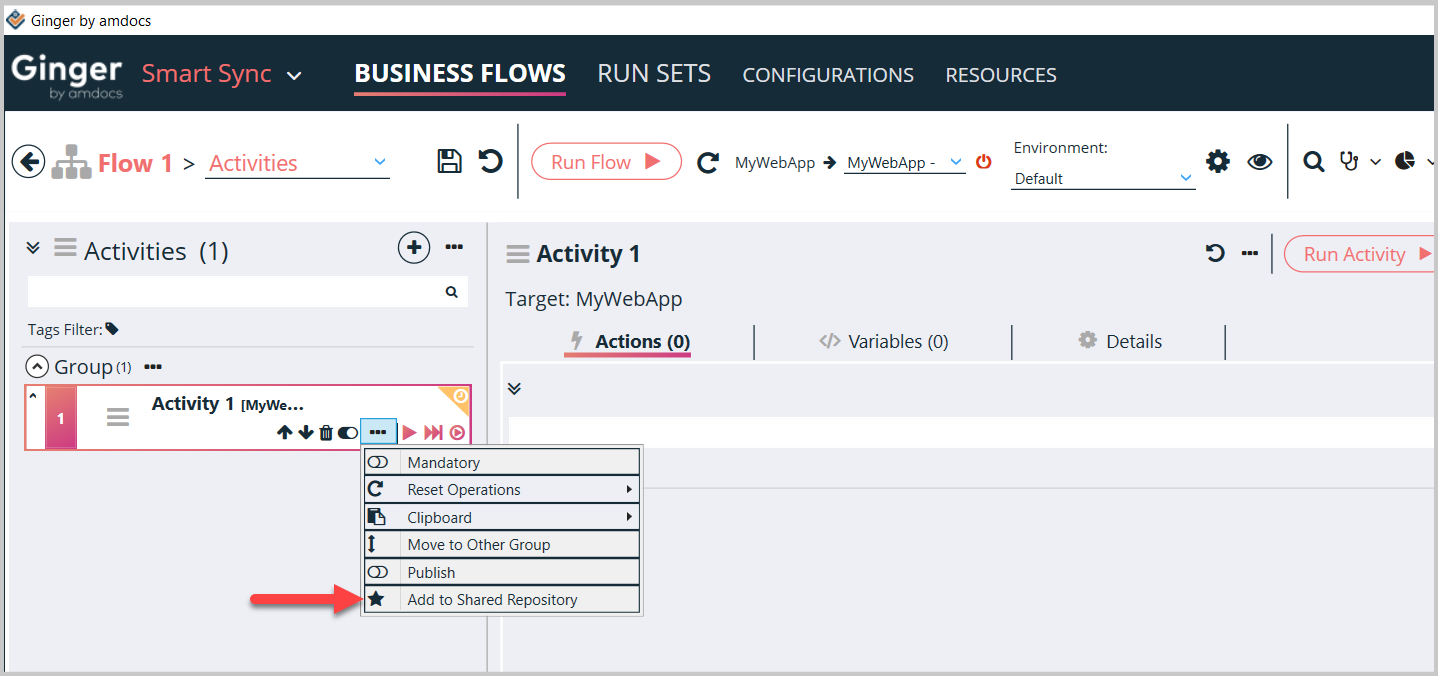
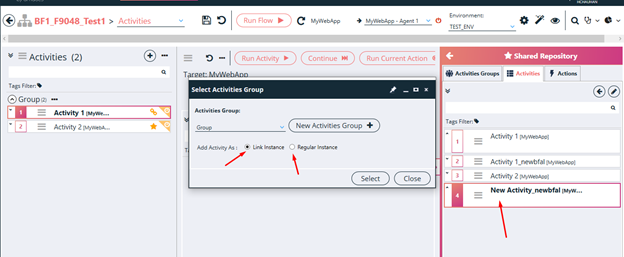
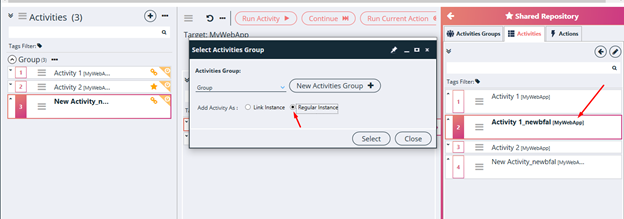
- To Upload Activity as Linked instance, please select Replace Type as ‘Link Instance’
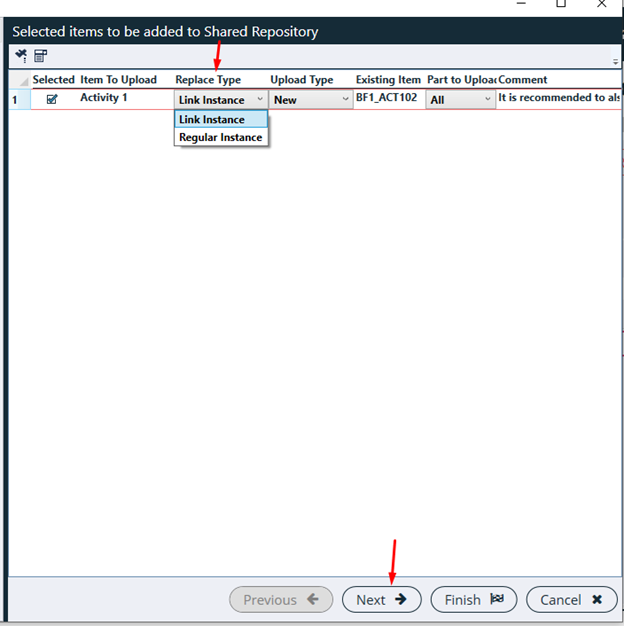
- Then click on next and follow the wizard to finish the upload

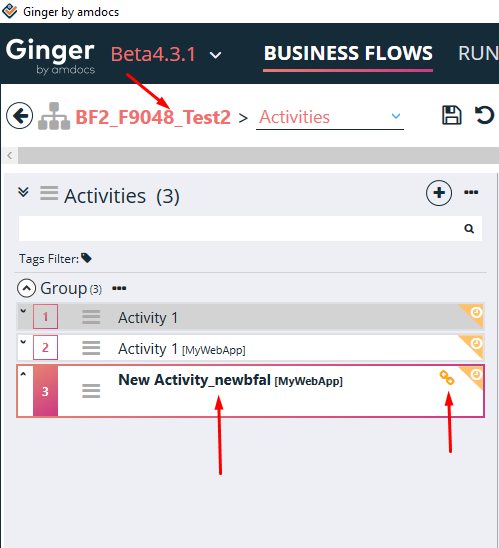
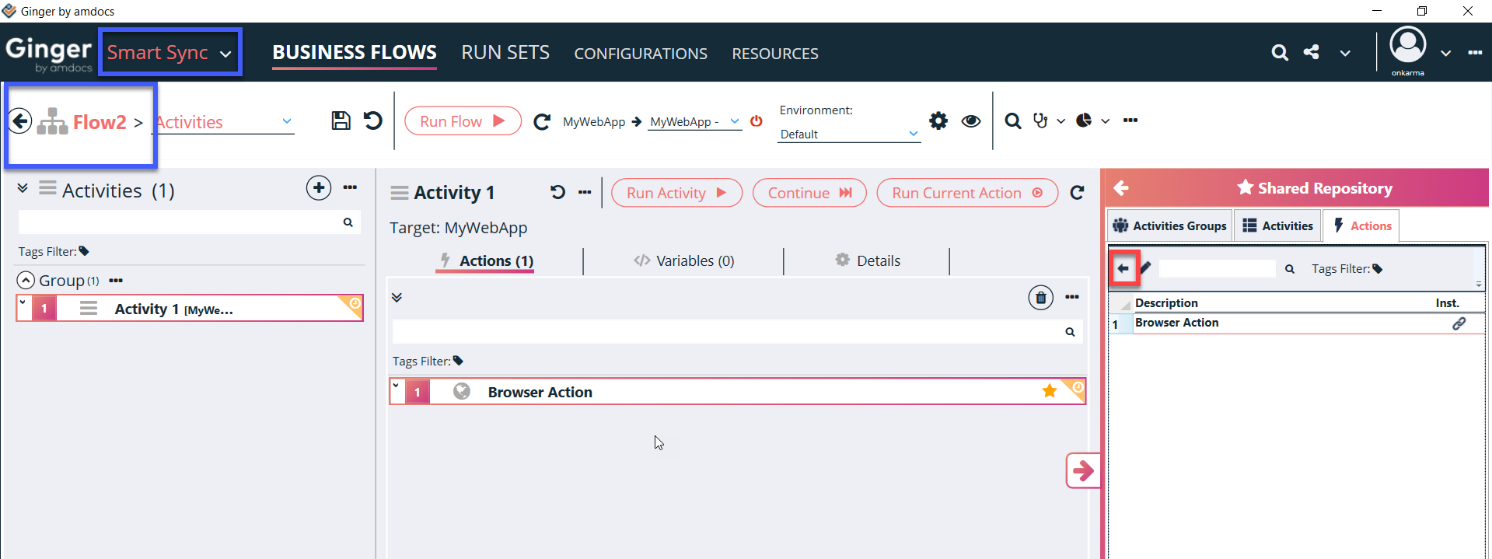
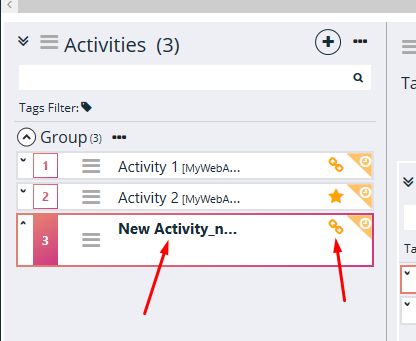
- Once the Activity is added to the Shared Repository, the ‘Link icon’ near the Activity will be displayed in Orange Color
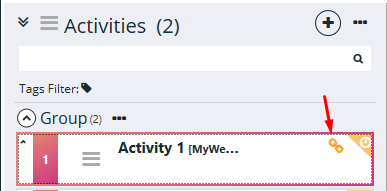
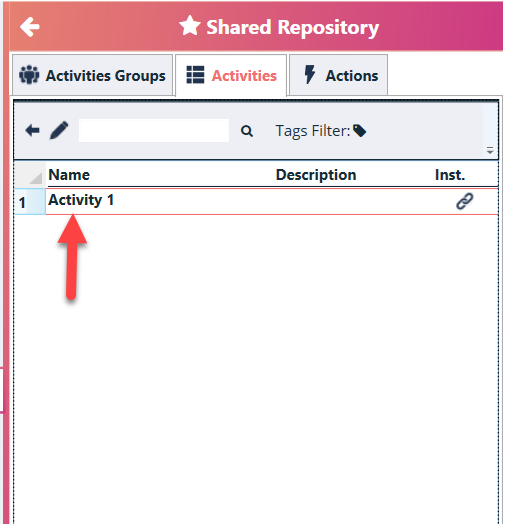
- Activity is added in the Activities section of the Shared Repository
Upload Activity to Shared Repository as Regular Instance (Copy)
Uploading Activity as Regular instance creates a copy of the Activity on shared repository and adds the id of the shared instance to the Business flow Activity for tracking the usage.
So with this option, any changes made in Shared repository,needs to be explicitly published to the different usage intances
Uploading Activity as Regular instance exist from first version of Ginger and this is the only option for Other Entitiy types i.e. Action, Activity Group and Variables.
However for Activities, Uploading as Linked Instance is added recently in version 4.3 and it is recommended option.
To Upload Activity as Regular Instance
- Double click on Business Flow in the Business Flows tab.
- All activities will be listed down for that business flow.
- Go to Specific Activity section
- Click on Add to Shared Repository shown below
- To Upload Activity as Regular Instance i.e. Copy, please select Replace Type as ‘Regular Instance’
- Then click on next and follow the wizard to finish the upload
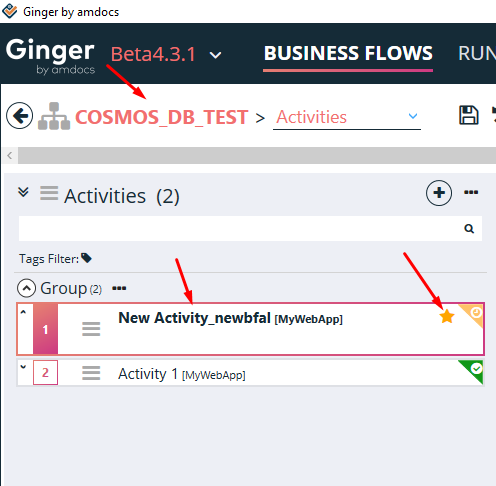
- Once the Activity is added to the Shared Repository, the ‘Star icon’ near the Activity will be displayed in Orange Color
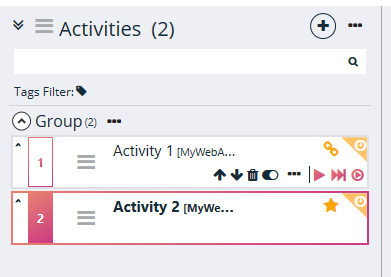
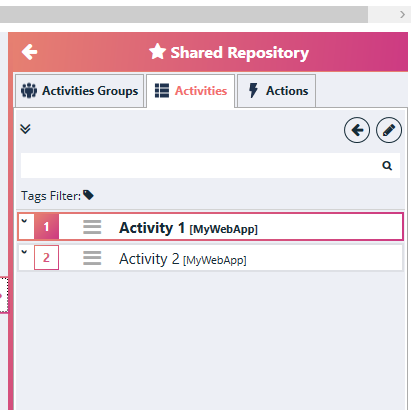
- Activity is added in the Activities section of the Shared Repository
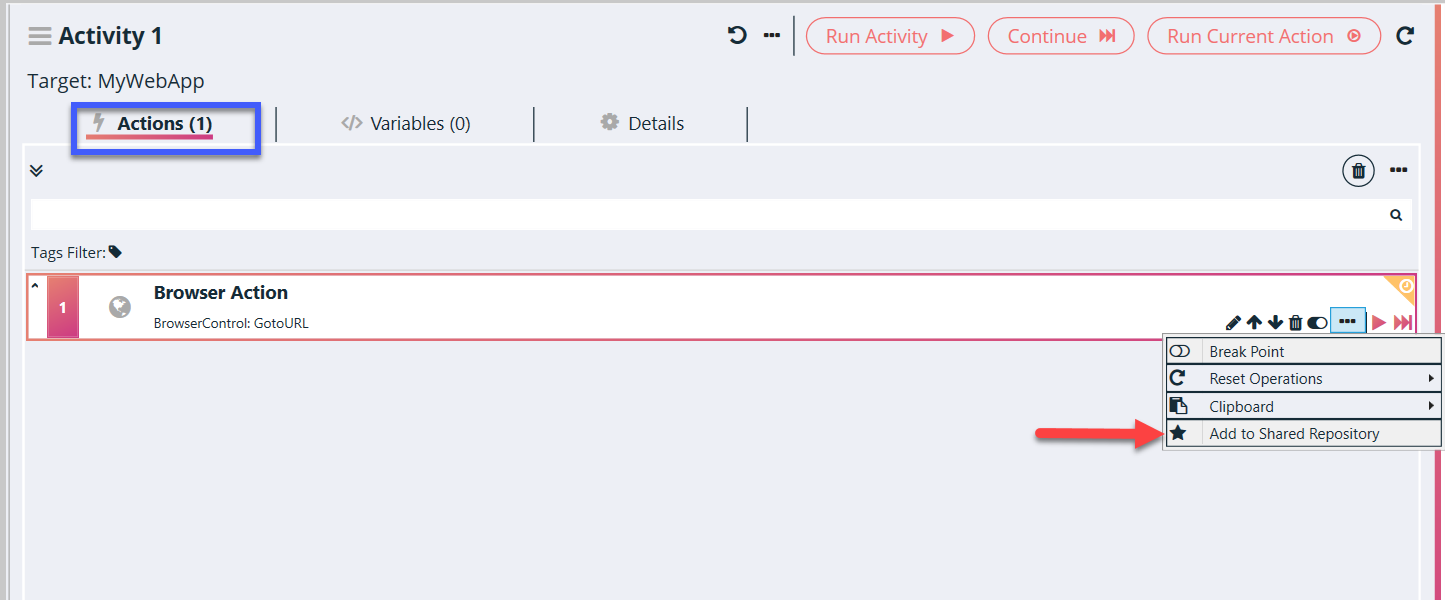
Upload Action to Shared Repository
- Double click on the desired Business Flow from the Solution tab.
- Business Flow details will get open in Automate tab. Go to Actions Section.
- See the Actions window in the below image of an Activity.
- All Actions will be listed down for the Activity. Click on the Add to Shared Repository as shown below.
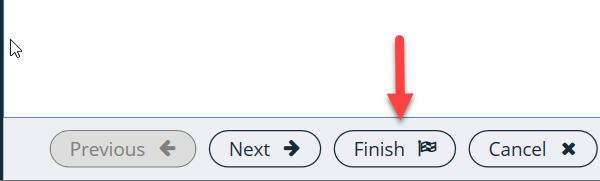
- Then click on next and follow the wizard to finish the upload

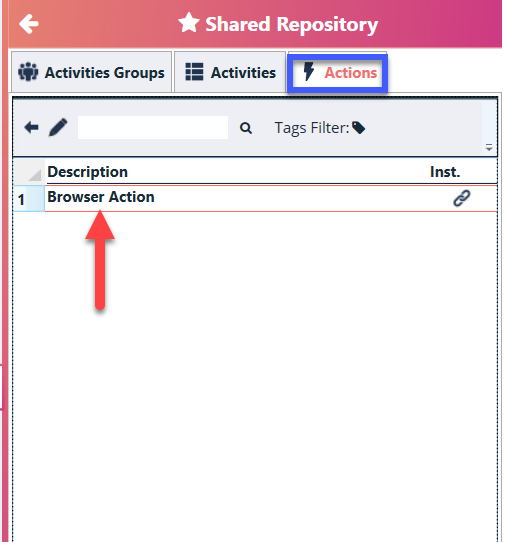
- After the action is added in the Actions section of the Shared Repository, the star turns orange in color.

- Verify Action is added in the Actions section of the Shared Repository
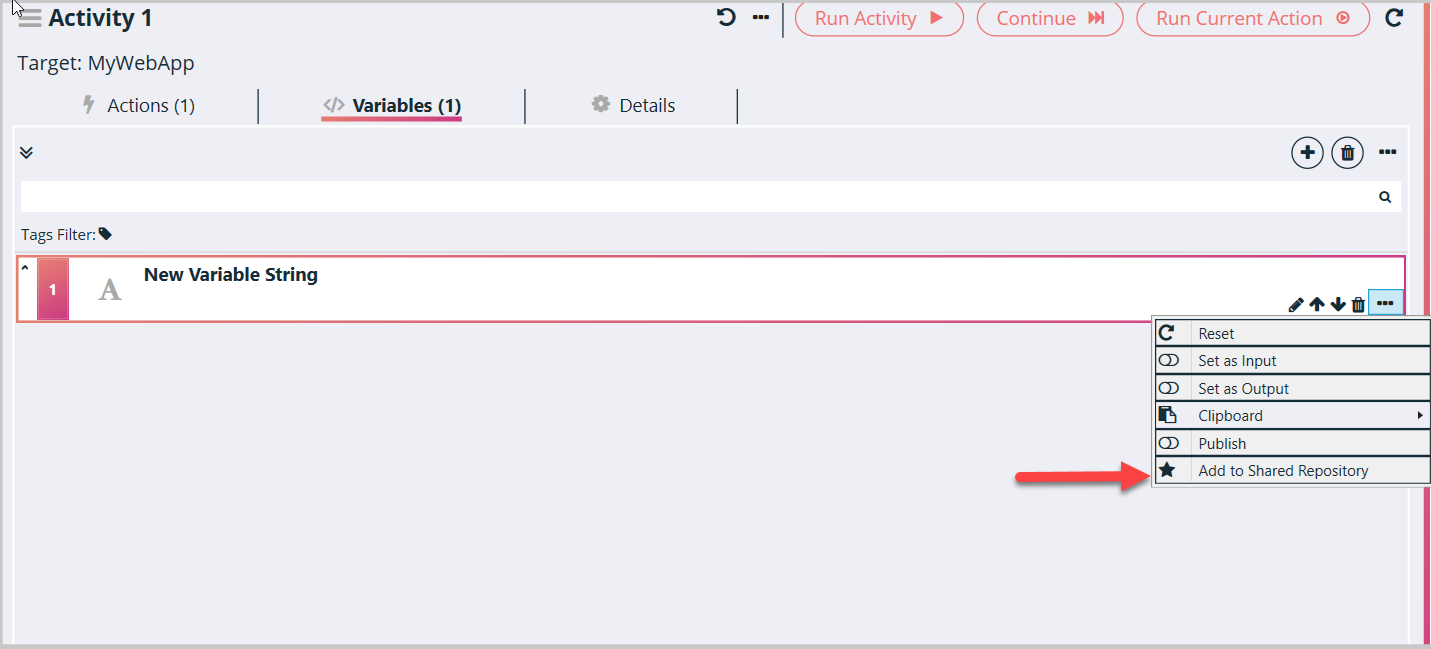
Upload Variables to Shared Repository
- Double click on the desired Business Flow from the Solution tab.
- Business Flow details will get open in Automate tab.
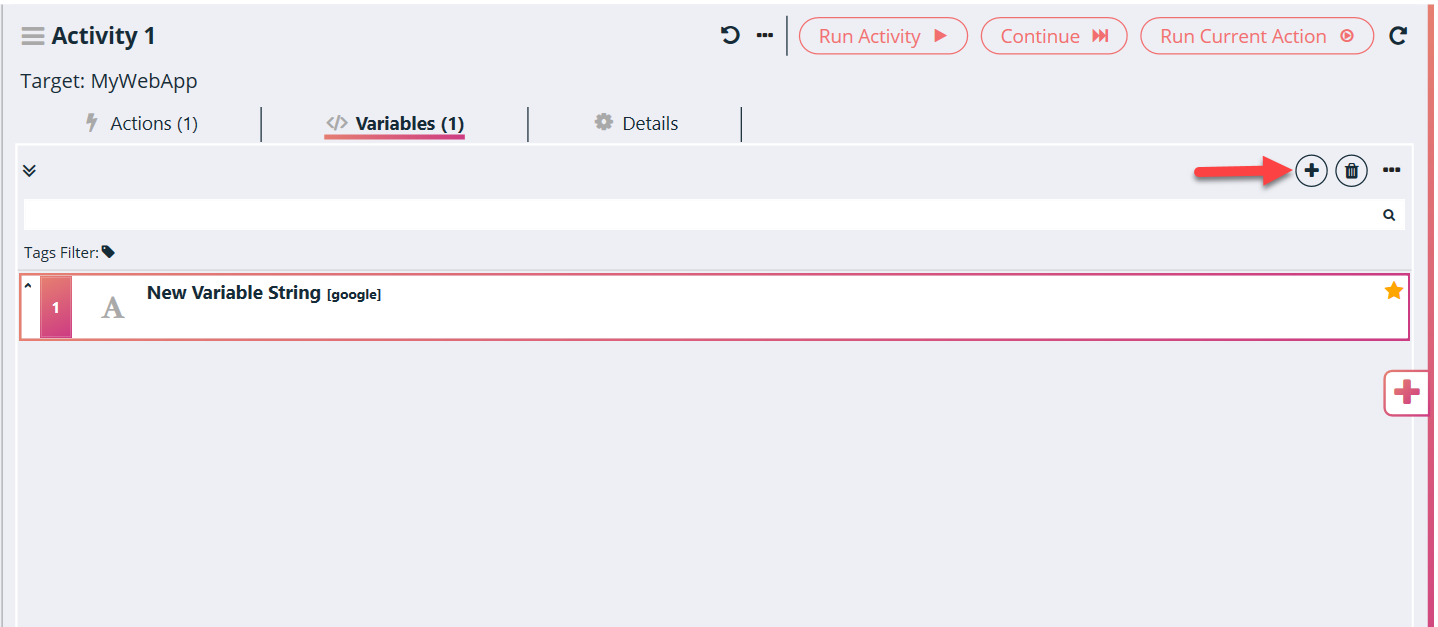
- Go to Variables tab, See the Variables window below in the image.
- All Variables will be listed down for the selected Activity.
- Click on the Add to Shared Repository shown below.
- Then click on next and again next and then click on finish.


- After the action is added in the Actions section of the Shared Repository, the star turns orange in color
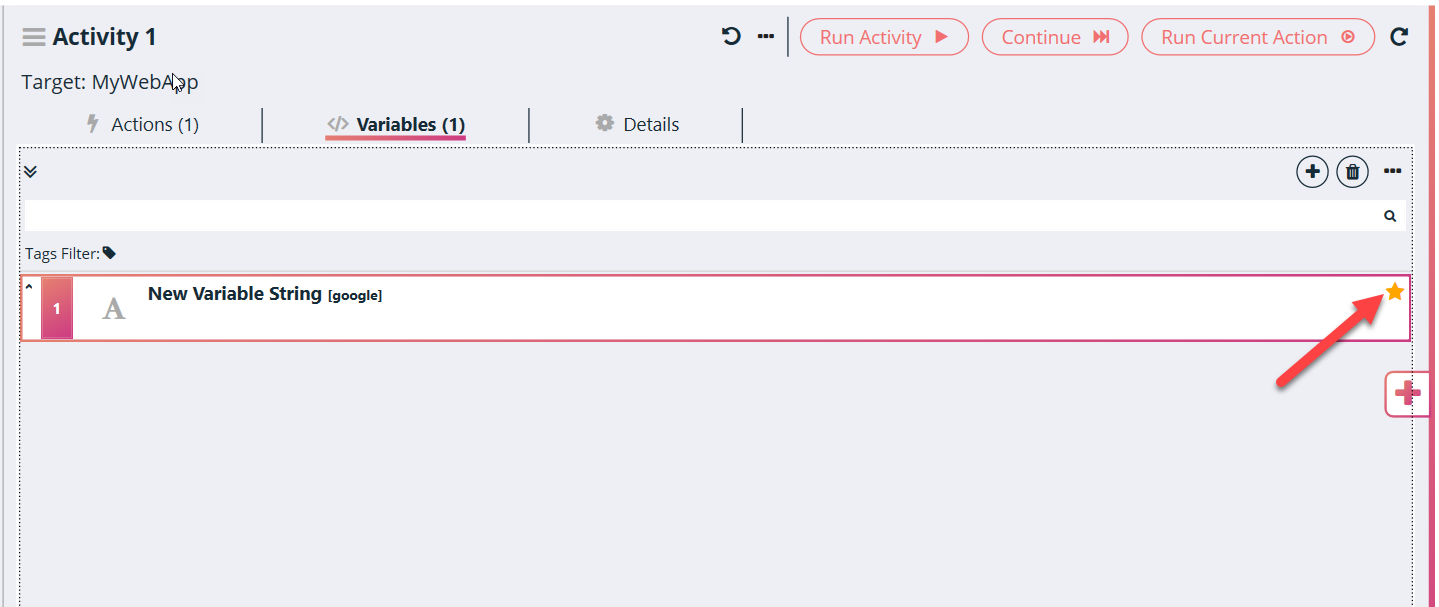
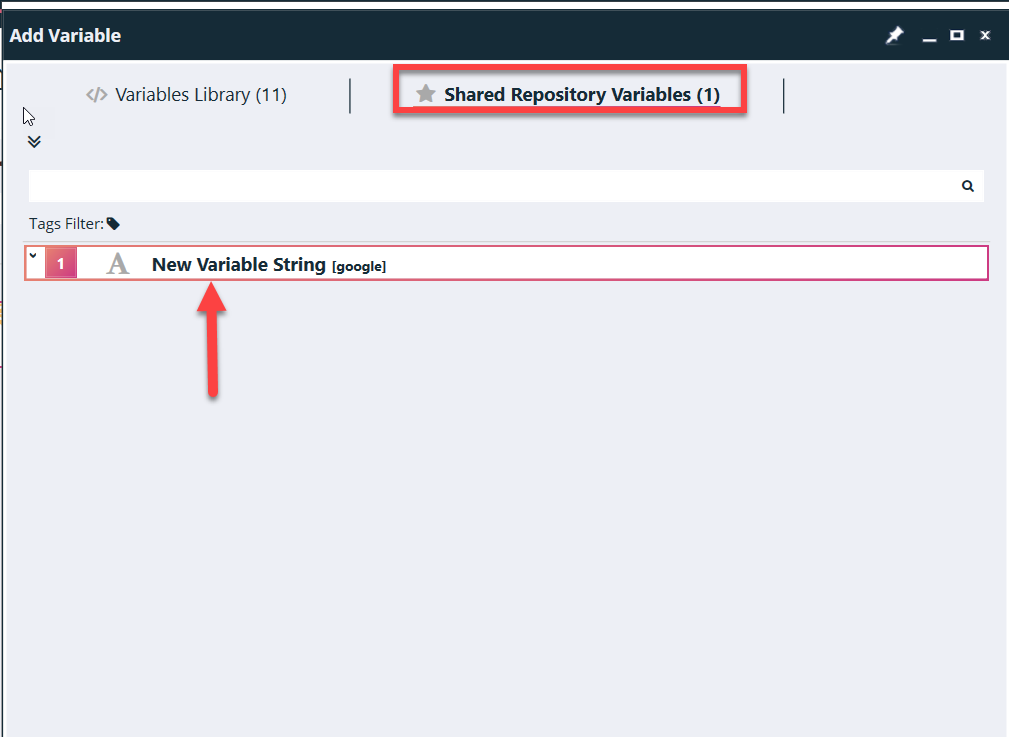
- Verify variables are added in Shared Repository after clicking on the ‘add new variables’ (+) button as shown below
Upload Activities Group to Shared Repository
- Double click on Business Flow under the Test from Solution tab.
- Business Flow details will get open in Automate tab. Go to Activities Groups Section.
- See the Activities Groups window below the image.
- All Activities Groups will be listed down for the Business Flow.
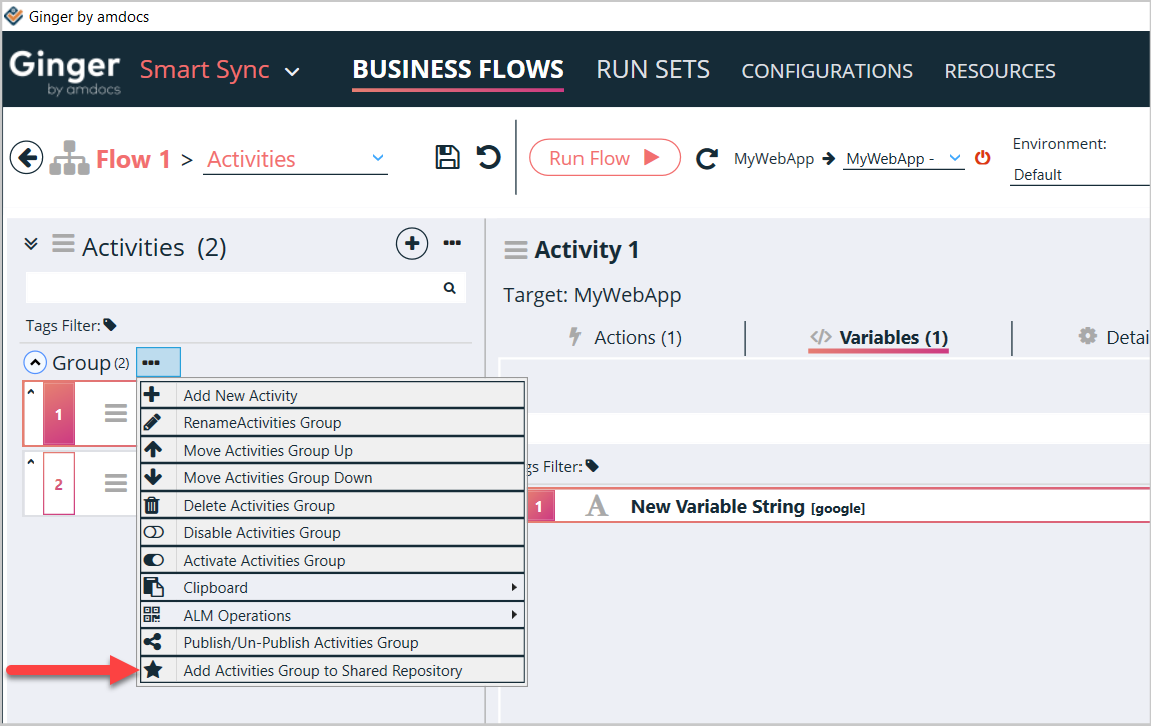
- Click on Add Activities Group to Shared Repository as shown below.
- Then click on next and again next and then click on finish.

- After the action is added in the Actions section of the Shared Repository, the star turns orange in color
It gets added in the Activities Groups section of the Shared Repository.
Reusing Shared Repository Items
The items in the Shared repository can be reused in one or more Business flows of the solution
To Reuse the item
- Create new ‘Business Flow’ or open existing business within the same solution
- Go to the tab in the Shared repository, select the item. Drag and drop it to the area where the item belongs to E.g., Action can be dropped only in the Action area of the solution
- Open the item in the Solution. The orange color star icon shows that this item is in the shared repository
- When the color of an item is Grey, then it means that the item is not in the shared repository

Reusing Shared Repository Linked Activity Instances
Shared repository Activity can be reused in one or more Business flows of the solution.
There are 2 types of usages depending on the working mechanism
Linked Instance (Default and recommended)
- In this the Actual Activity is always belonging to shared repository. And different business flow where it is used will have only the reference or pointer to the shared repository instance.
- Any changes made in shared repository activity will be Automatically reflected to all the instance usages
- For the Activity pulled as Linked instance, The ‘Link icon’ near the Activity will be displayed in Orange Color
Regular Instance
- In this the Activity copy or clone is created on the business flows where it used and Shared Activity id is kept as reference.
- Any changes made in shared activity needs to be explicitly published to selected instance usages
- For the Activity pulled as Regular instance, The ‘Star icon’ near the Activity will be displayed in Orange Color

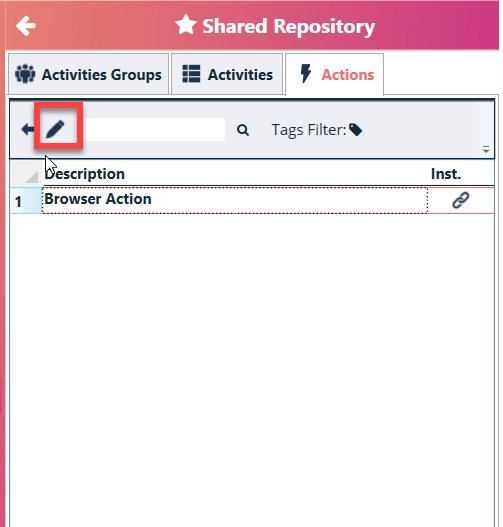
Edit Items in Shared Reposioty
- The Items in the shared repository can be modified using the pen icon (Edit) as highlighted below.
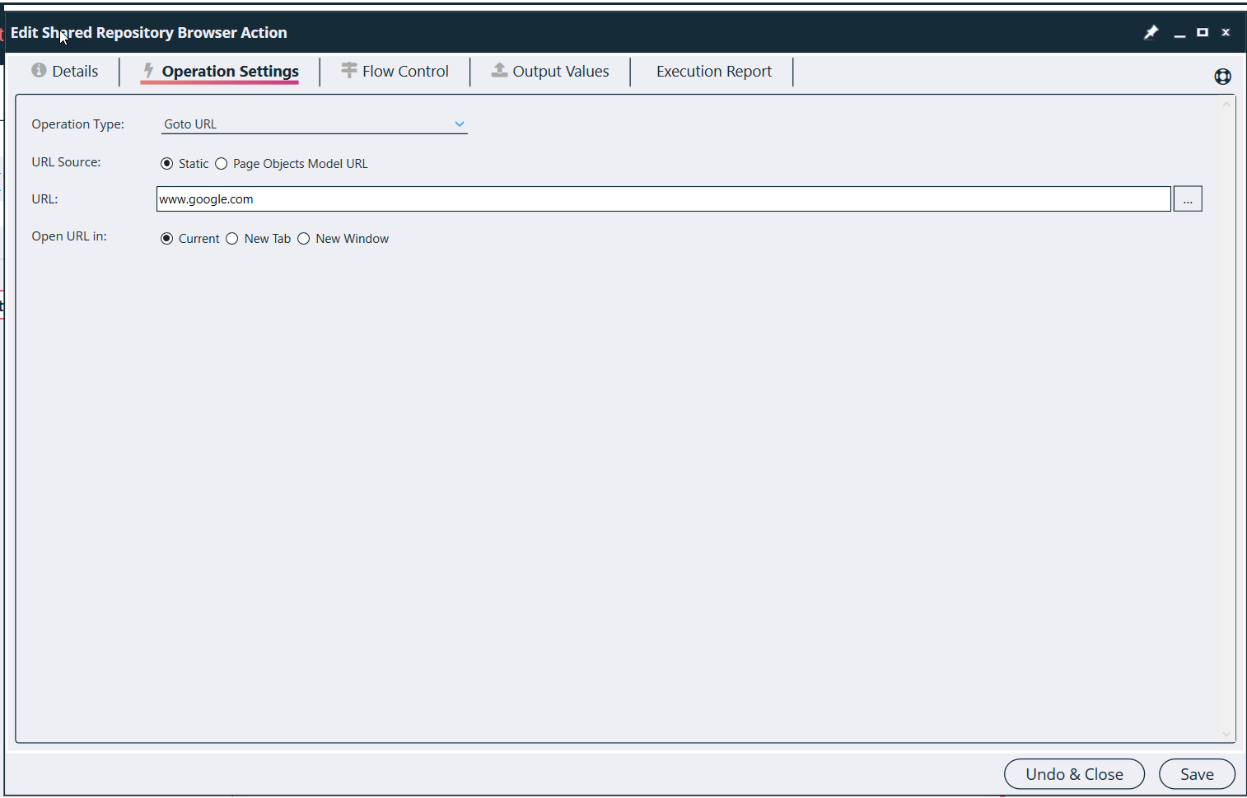
- This opens the Edit window as shown below.
- On clicking the Save button, a message is populated for confirmation of changes if the item is used in the solution.
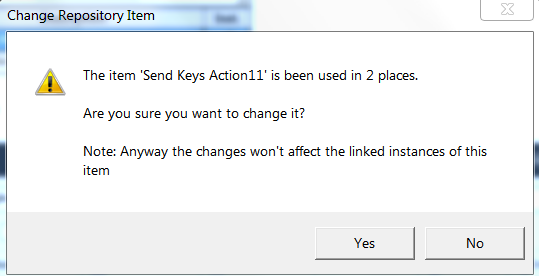
- On clicking the Yes button, the repository gets updated. This does not update its instance in the solution.
- Clicking on the No button does NOT update the repository.
Upload Modified or Changed items from Business flows to Shared Reposioty
Changed or Modifed items can be uploaded to shared repositry by following the same steps as uploading a new item explained above
A backup of the existing item is saved in the ‘Pre-Versions’ folder as shown below.

Find all instances or usages of the Shared repository item
- Go to Shared repository section and expand item from shared repository
- Hover mouse on the expanded item then you will see one link icon

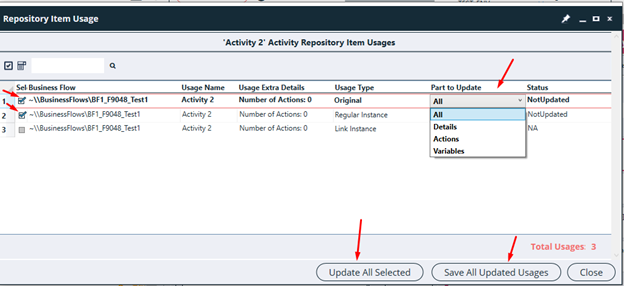
- After clicking on this link icon, a new window is opened which displays the list of flows where the item is used
- The status is displayed to know if the item is updated in the Solution after it was modified in the Shared repository

Publish changes from Shared repositry to all instances or usage
- For any changes in shared repository item, make the required changes as shown in the section Edit Items in Shared Repository
- Then open the 'Repository Item Usage' window to get the usages in the solution, as explained in previous section
- Select the desired items and select the Part to Update. Part to update allows to update only selected section. Default part to update is set to All
- Click on the ‘Update All Selected’ to publish changes to selected usages
- Then use the ‘Save All Updated Usages’ button to save the changes.
- This updates the selected instances in the Solution as per changes made in the shared repository.
- All activity added as ‘Link Instance’ would be updated automatically once any changes made in shared repository’s activity. So for them the Status will be set to NA as default, as There is no need to update explicitly in this case.
De-linking item from Shared repository source
Note: -Only those items can be de-linked which were added from the shared repository. The original items that were used to create a
shared repository cannot be de-linked.
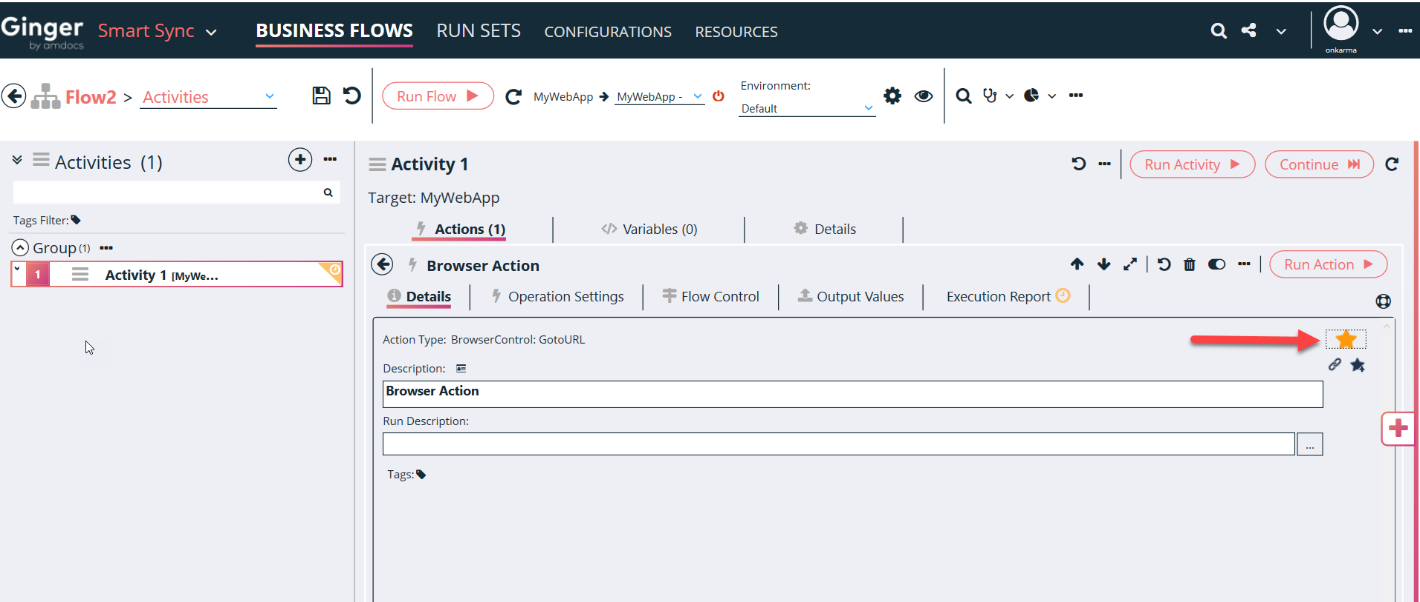
- Select the desired item in the solution and open it in the Edit window. Click on the orange star as shown below
- Note: -Only those items can be de-linked which were added from the shared repository. The original items that were used to create a shared repository cannot be de-linked.
- Below confirmation message is displayed
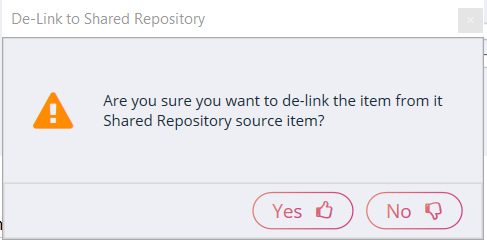
- Click on the Yes button. The item is de-linked from the shared repository and the star color changes to grey as shown below
Publish Shared Activity or Error Handler Activity to multiple Business flows
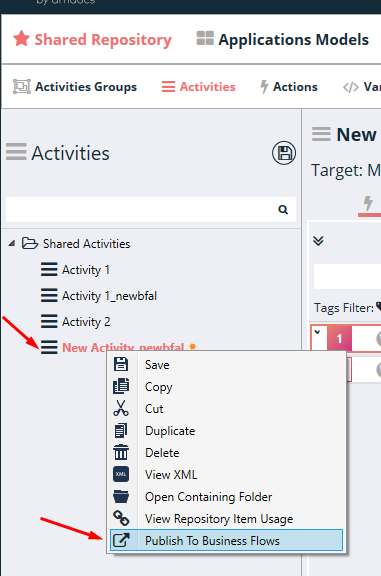
- Go to Resources Tabà Shared Repository à Activities Tab
- All the activities of Shared repository will be displayed.
- Select activity which you want to publish and right click on it
- Select option ‘Publish to Business Flows’ as shown below
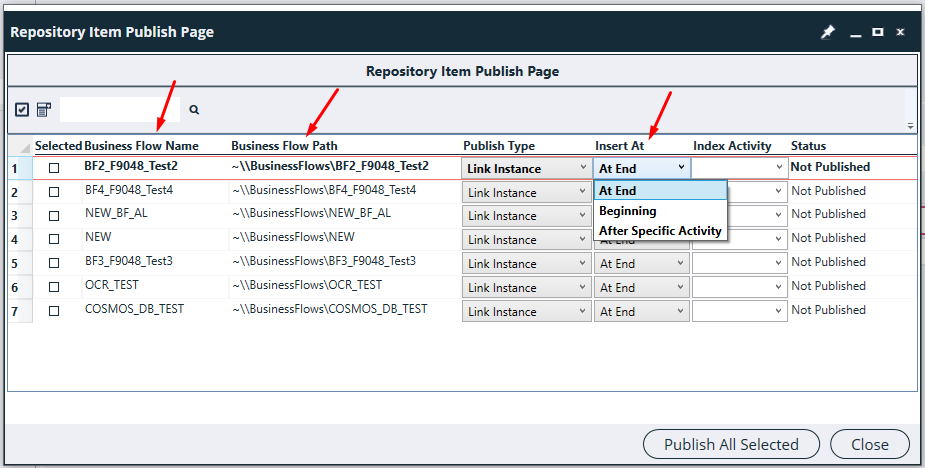
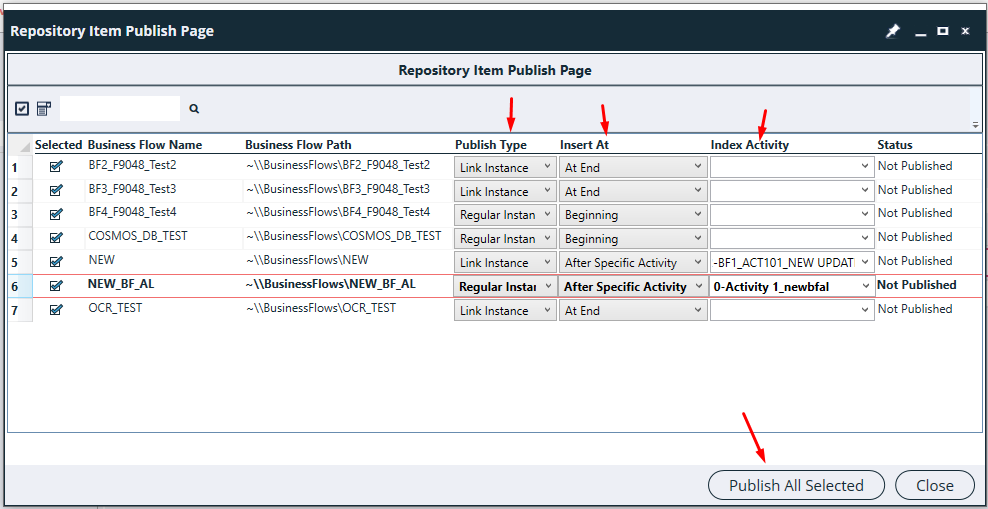
- A new window will be opened. This will display all the business flows where selected activity is not present.
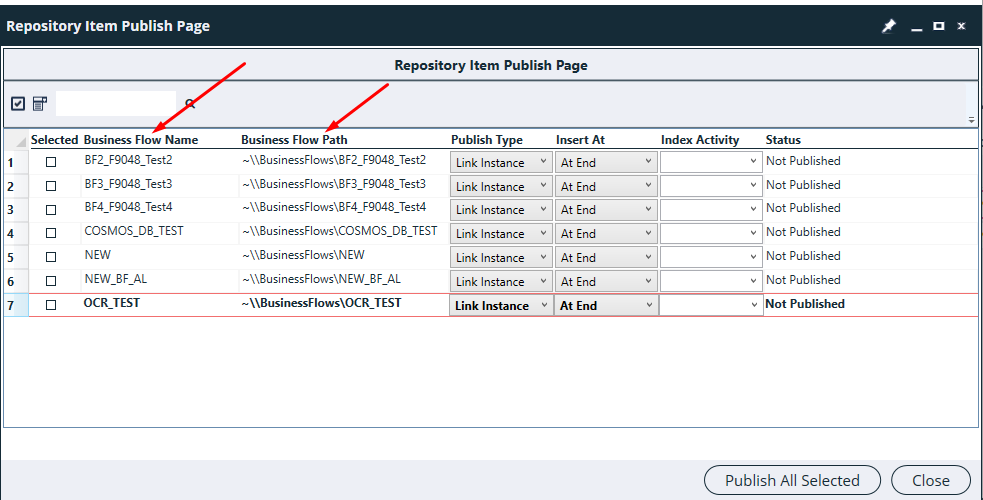
- Select all the required business flows where you want to add selected activity
- Select the option of Publish Type as Link Instance / Regular Instance
- Select Insert at option to decide the position where you want to insert this activity.
- After all selection, click on Publish All Selected Button
![]()
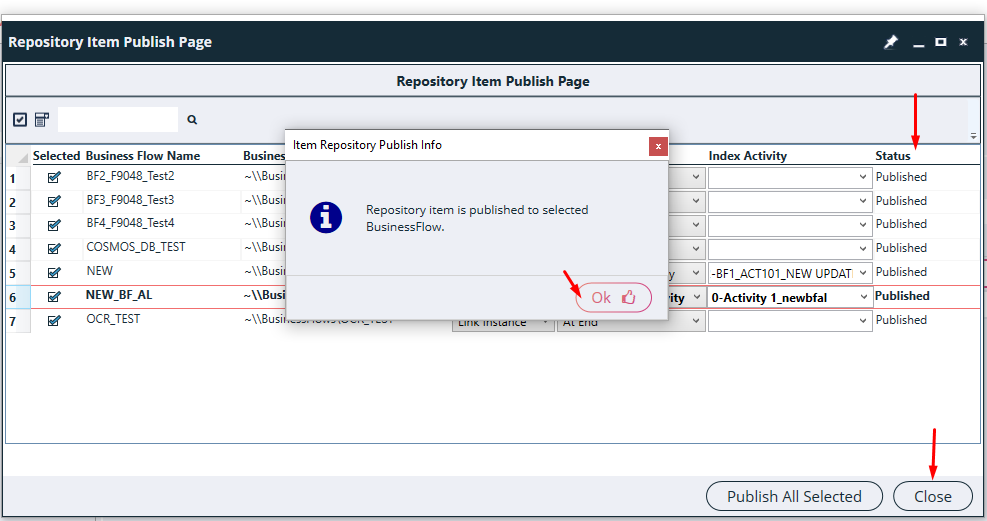
- Now Validate on respective business flows, this activity would have been added at selected insert location.