How to use Source Control in Ginger?
Introduction
When multiple users are working on the same solution then it is better to put the solution on a repository
like GIT (Git Lab & Git Hub)
This helps the solution to be edited by multiple users and the latest solution can be downloaded by the users.
Pre-requisite
Note: All users should use the same version of Ginger to take the benefits of Repositories.
What are the different types of Repository?
There are below types of repositories
- GIT (Git Lab & Git Hub)
How to download a solution GIT Repository ?
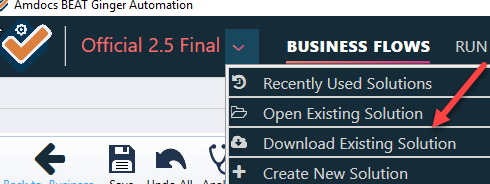
Click on the Solution name drop-down and select the “Download Existing Solution” option.
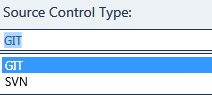
In the displayed window, select the GIT open in the Source Control type.
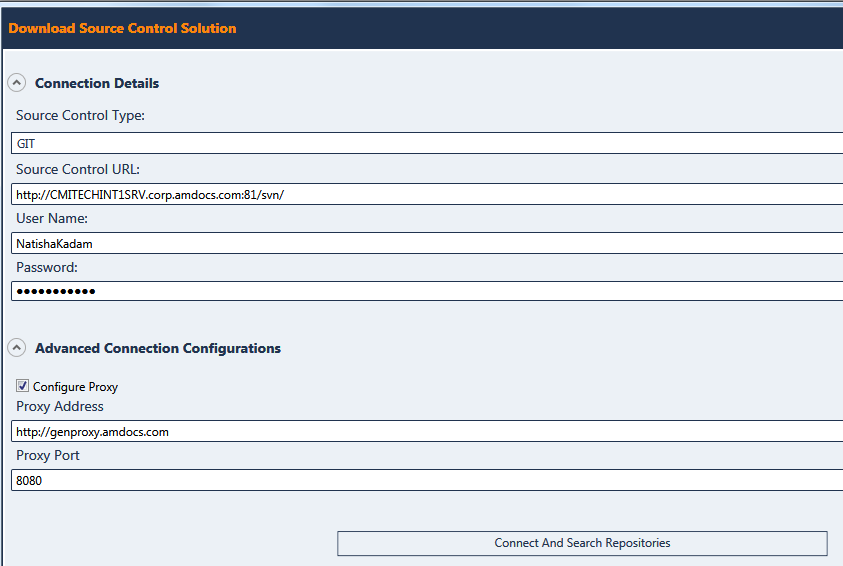
enter the login credentials, the GIT URL.
Expand the Advanced Connection Configuration and click the “Configure Proxy” check box.
Click on the “Download Selected Solution” button.
Note: Ginger uses URL:- https://github.com
Once the login is successful then the “Connect and Search Repositories” button gets enabled.
Click on the button.
A list of solutions is displayed to which the user has access.
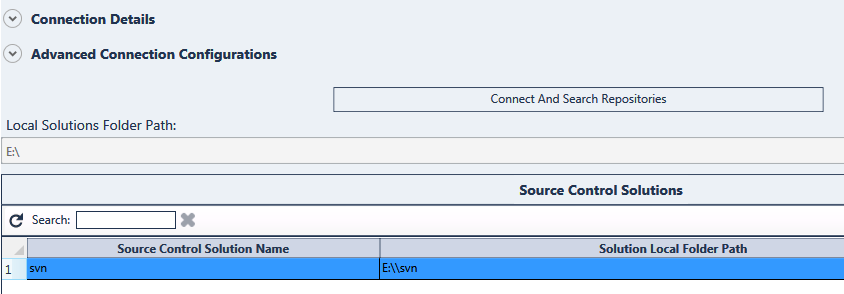
The desired folder where you want to store the solution on your local PC can be given in the “Local Solutions Folder Path” using the “Browse” button.

The column “Exist Locally” helps to determine if the solution was already downloaded on your local PC. If yes then it is displayed as “True” else “False” is displayed.
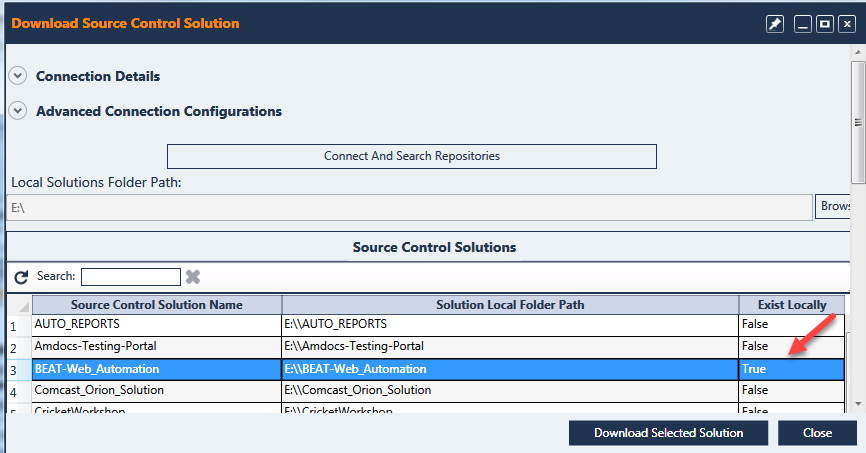
Select the desired solution and click on the “Download Selected Solution” button.
A message is displayed about the successful download. I also want to know if you want to open the
Downloaded Solution.
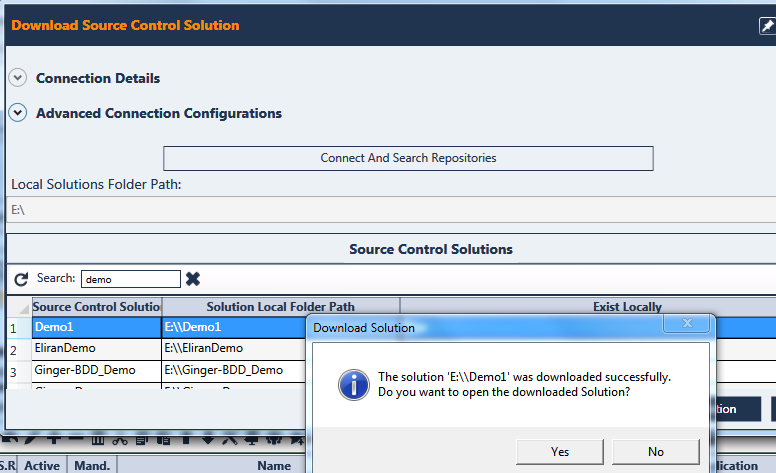
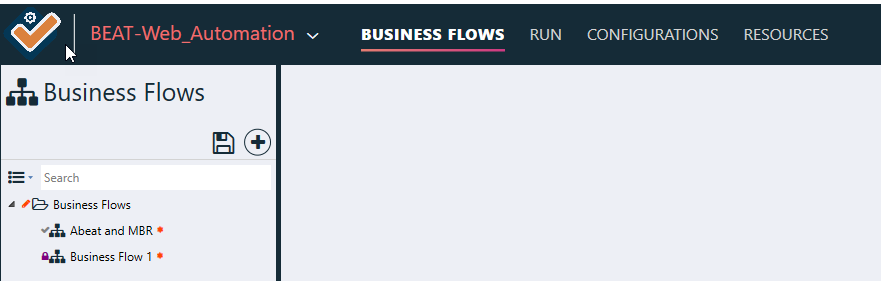
Click on Yes to open the solution.
How to Check-In the changes made in the solution to GIT/SVN?
There are 2 ways to check-in the changes made in the solution.
Check-in on the Solution level and check-in on the individual components of the Solution.
Solution Level check-in:-
In the Business Flow tab, click on the ‘Source Control Operations’ button as shown below.
Select the ‘Check-In Solution Changes’ option.

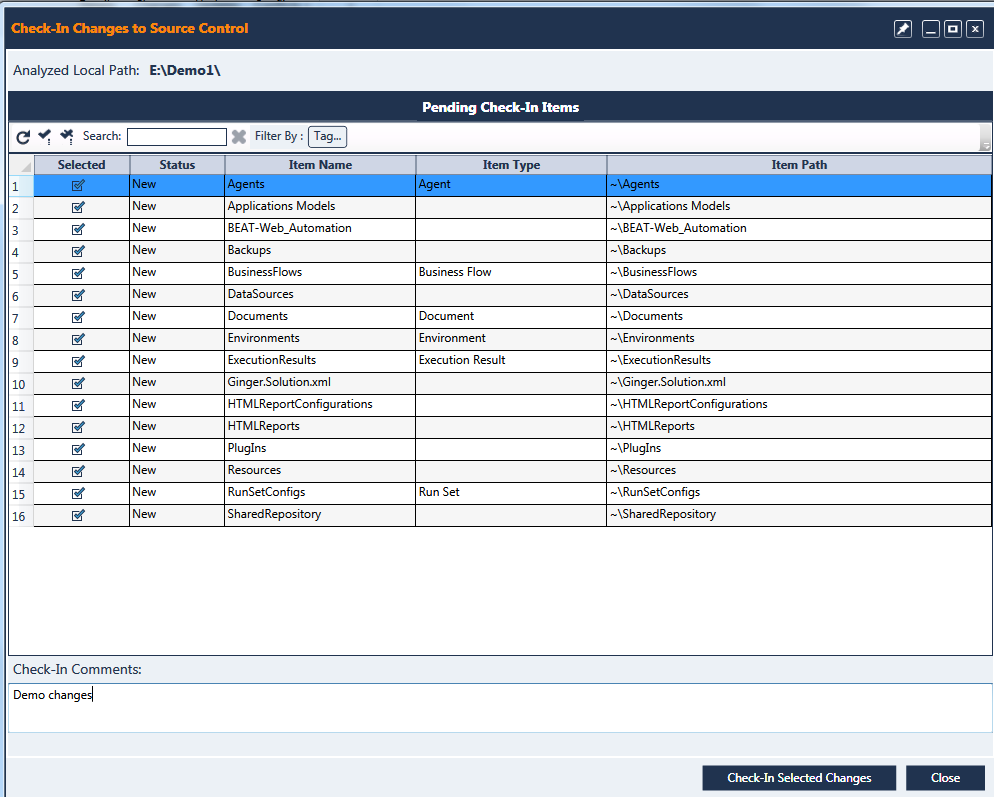
The new window presents a list of changes that need to be updated in the SVN.
Select All the changes or just the selected ones.
Click on the “Check-In Selected Changes” button.
A warning message is displayed if you want to confirm the changes.
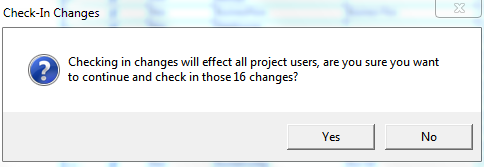
Click on the Yes button to continue with the updates. This will update the SVN.
Component Level check-in:-
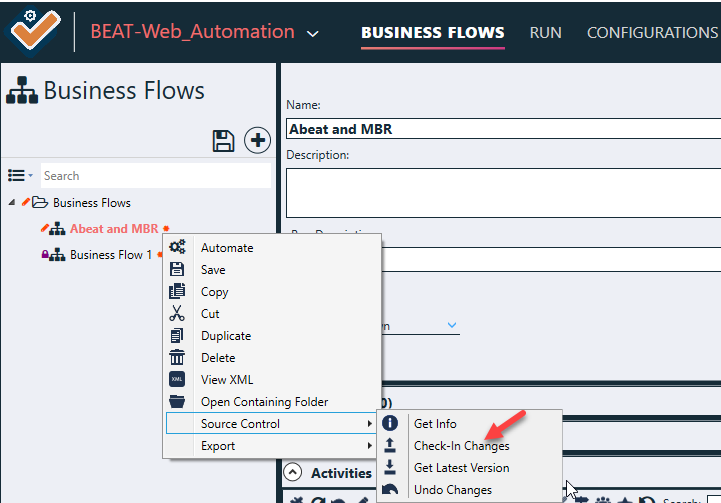
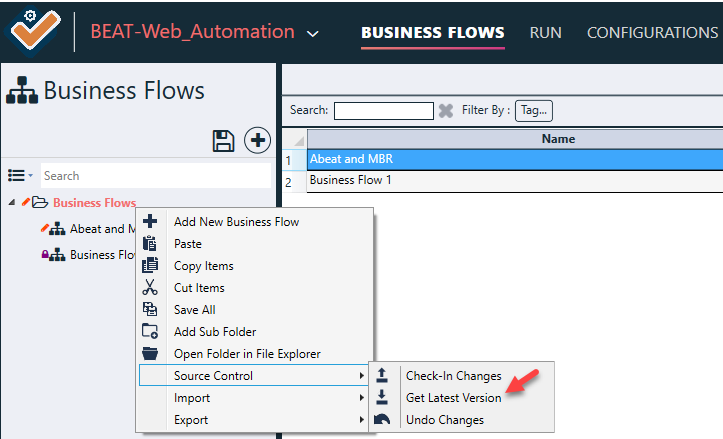
In the Business Flow tab, right-click on the Business Flow where the changes are made.
Go to Source Control and select Check-In Changes.

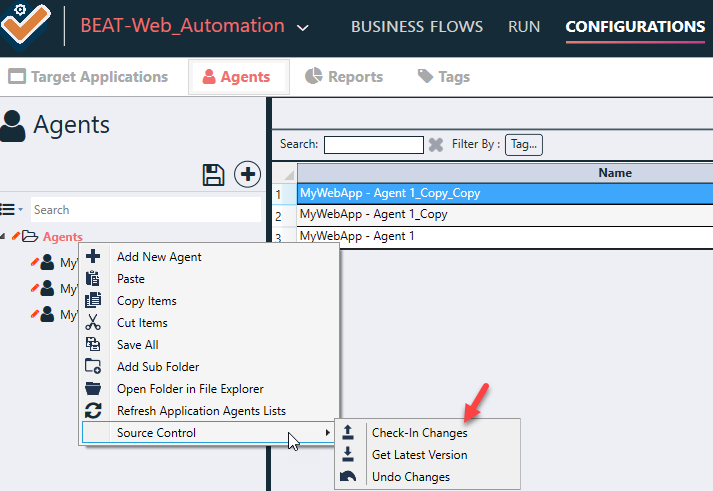
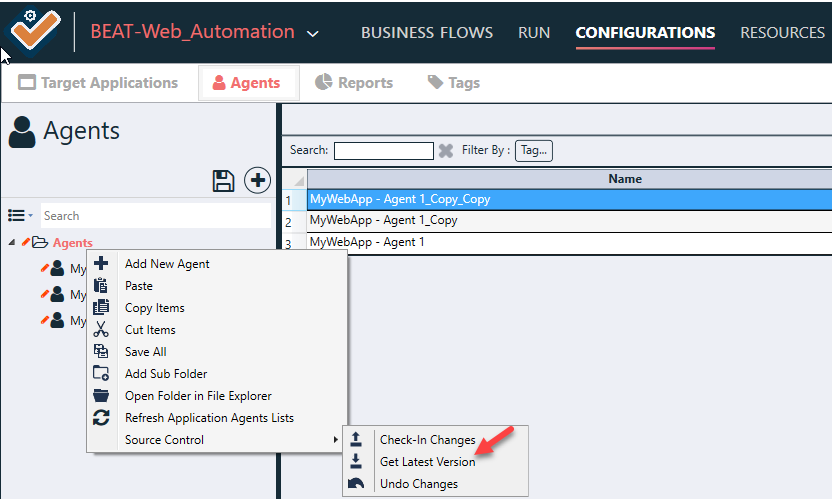
We can Check-in changes on components like Agents and Reports under the Configurations tab as shown below.
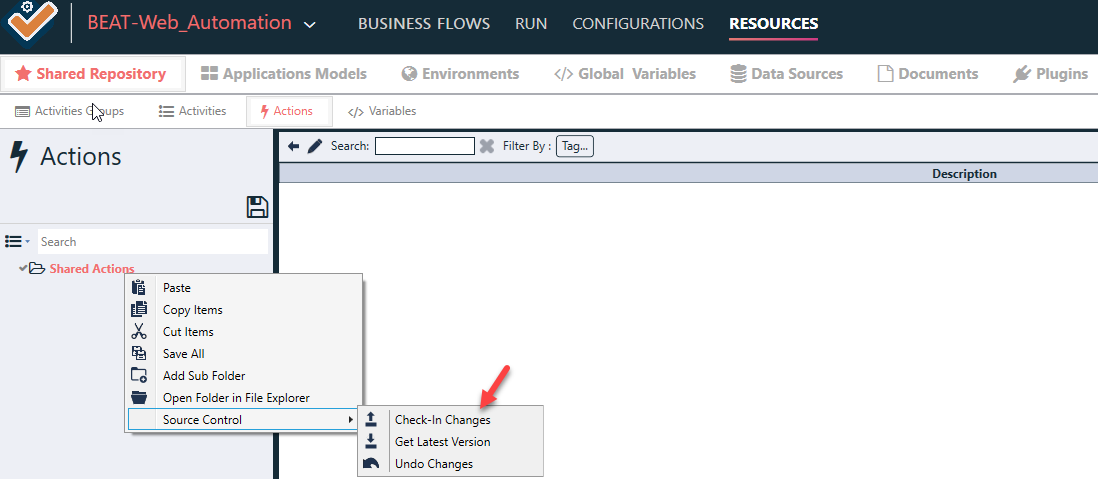
From the Resources tab, we can Check-in changes on components like Shared Repository, Applications Models, Environments, Data Sources, Documents and Plugins by right-clicking on them as shown below.
How to get the latest solution from GIT/SVN?
The latest updates of the solution can be fetched by clicking on the ‘Source Control Operations’ button as shown below.
Select the ‘Get Latest Solution Changes’ option.
Whatever changes are updated by other users and stored in the SVN will be downloaded.

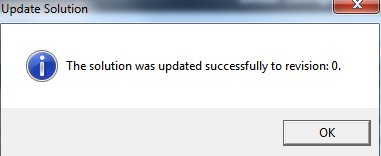
A message is displayed once the download is successful giving the information the revision number.
You can also get the updated changes from SVN only for a particular component.
Right-click on the component, Go to Source Control and click the “Get Latest Updates” option.
How to Undo changes done in the solution?
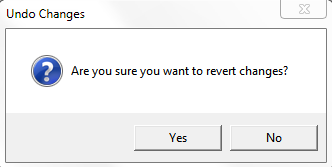
When changes are made in the solution and you do not want that changes to be saved in the SVN then you can Undo the changes.
This will take your Solution back to the latest version from the SVN. The changes made on the local PC will be lost.
Right-click on the component whose changes you want to remove and select the “Undo Changes” option.
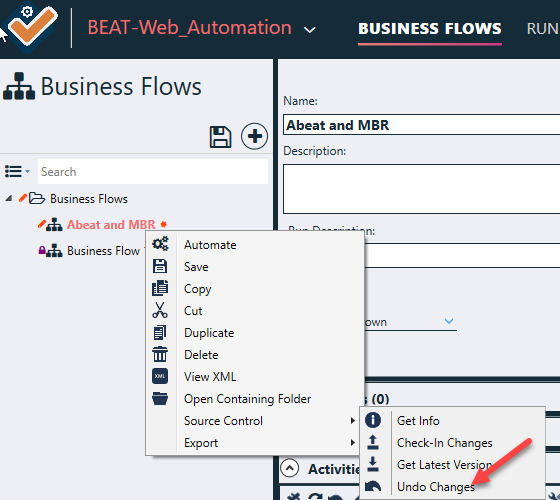
A message of confirmation is displayed. After clicking the Yes button, the changes will not be available in the solution.
How to Resolve Conflicts?
When multiple users are working on the same solution at the same time then there are chances that conflict arises during the Check-in process.
Ginger will display a message in such cases.
Click on the ‘Source Control Operations’ button on the top right corner of the screen. You will be presented with a new window, with all the conflicted files in the solution. For each conflicted file, there are 3 options to resolve these conflicts.
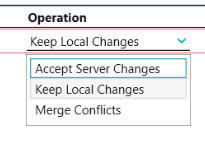
Keep Local Changes
In this option, only your changes will be saved in the source control. The changes made by other users will not be uploaded.
Accept Server Changes
In this option, only changes made by other users will be updated in the source control. Changes made by you will be lost.
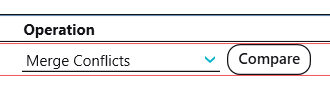
Merge Conflicts
In this option, you must manually resolve each conflict in the file. When you will select the merge conflict operation, you will be presented with ‘Compare’ button to compare both local and server file versions.
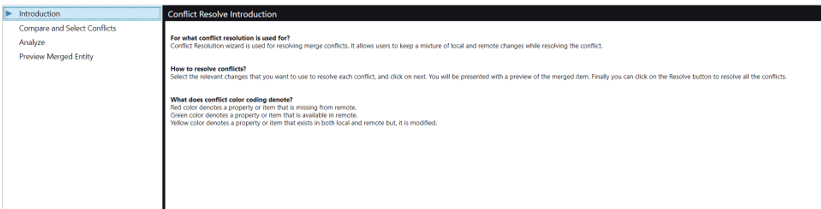
When you click on the ‘Compare’ button you will see the ‘Resolve Merge Conflict’ wizard. This wizard contains 4 pages.
Introduction
This page gives you a brief introduction about the manually conflict resolution process.
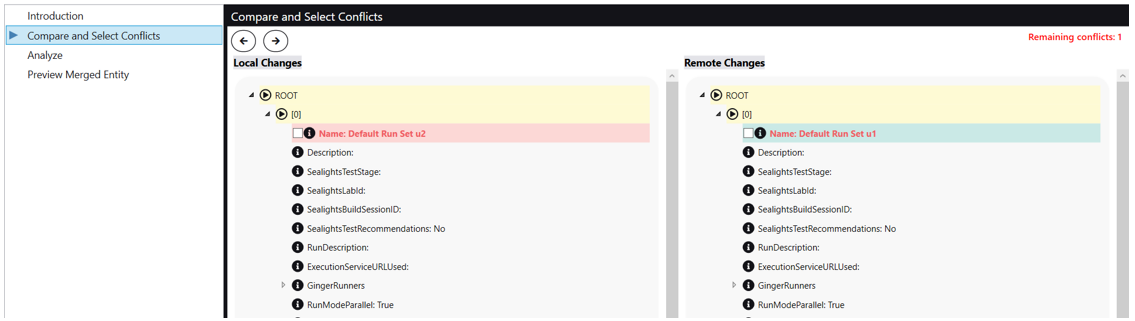
Compare and Select Conflicts
This page shows you the comparison between the local and server version of the conflicted file. Some of the fields in the file is color coded,
Yellow: Denotes fields that has been modified and contains some changes within them.
Red: Denotes values that are present in local but not available in the server version.
Green: Denotes values that are present in server but not available in the local version.
For each conflict, you must choose which change you want to keep.
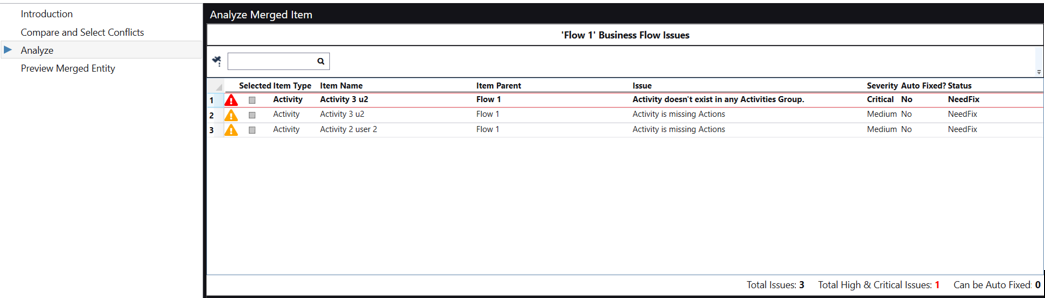
Analyze
This page is only visible for entities that support analyzation. Here you will be able to see if you have any issues in your merged entity. In case, you have any High/Critical issues then you won’t be able to proceed further with your conflict resolution and you must resolve those issues before proceeding.
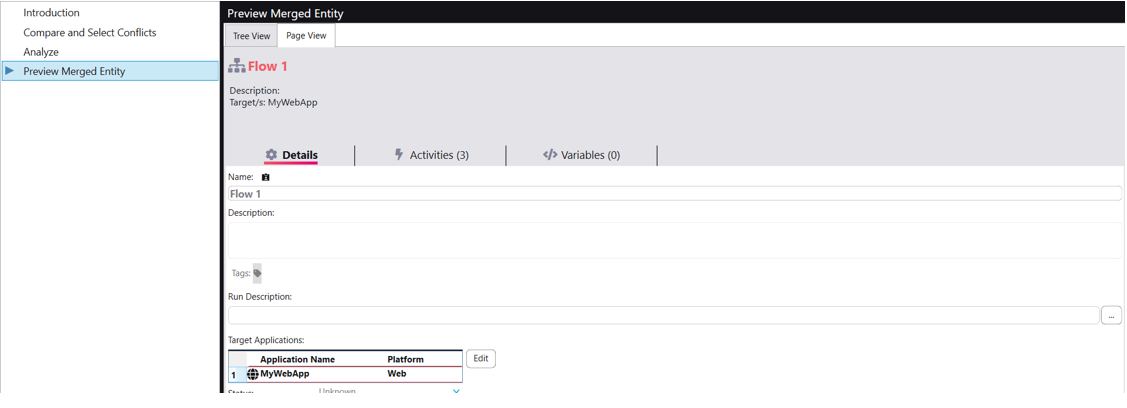
Preview Merged Entity
This page gives you a preview of how the merged entity would look like.
NOTE: At this stage, the resolved file has not been saved to the file system. This is just a preview of how the final resolved file would look like.
After resolving all the conflicts for the file, when you close the wizard. You will go back to preview window where you would see that now your conflicted file is ready for resolution.

Now, if you click on the ‘Resolve’ button then your file will be resolved with the changes that you selected.
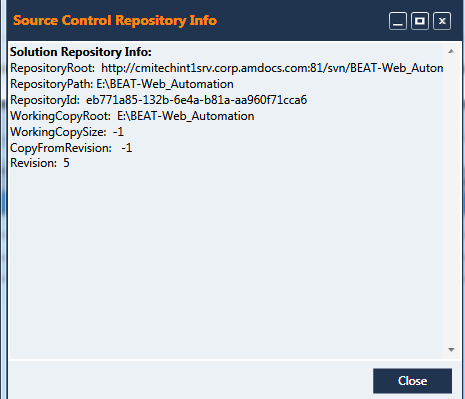
How to get repository details?
In the Solution tab, click on the “Repository Details” button.

The details about the Solution stored in SVN are displayed.
It gives the URL of the solution in SVN, the path of the solution in the local PC, Revision number and other details.
How to get info on a repository of a Ginger component?
Right-click on the component. Go to Source Control and select the “Get Info” option.
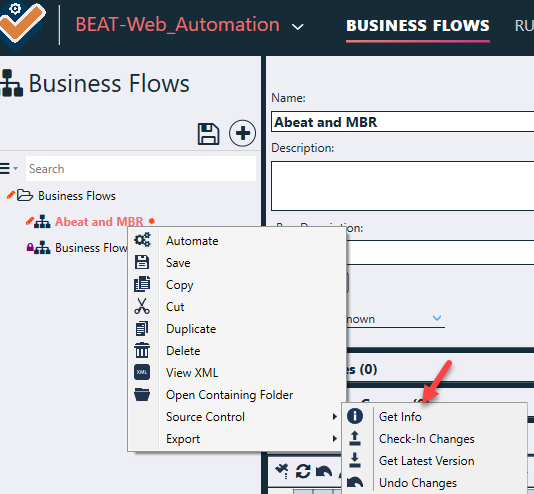
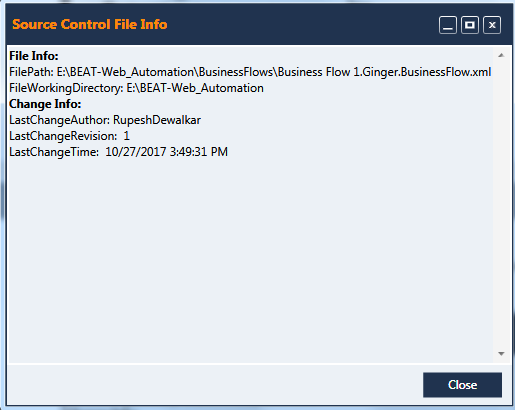
The details about the Component are displayed.
It gives the path of the XML File in which the component is stored on the local PC.
The revision number from the SVN is also displayed along with the Change Date & Time.
How to use the GIT repository?
The usage is the same as the SVN as shown in the above points.
The difference is in the login credentials as shown below.
Select GIT in the Source Control Type, enter the URL, user name and password as displayed below.
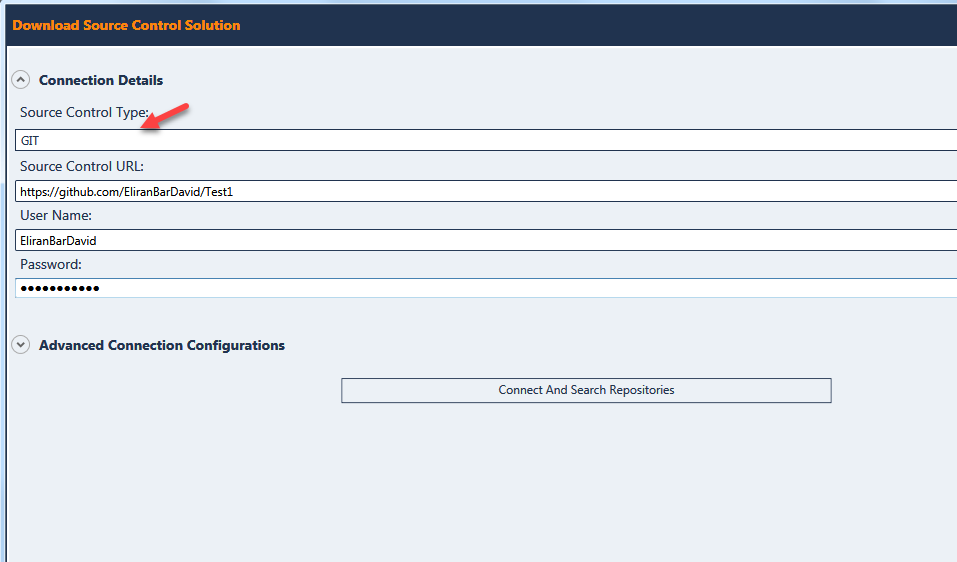
Click on the ‘Connect And Search Repositories’ button. On successful login, the solutions will be displayed.

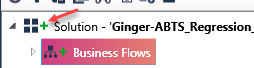
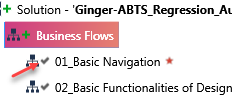
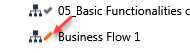
What is the different color indicate while using the Repository?
The Green plus color- indicates that the solution is downloaded from the repository.
Grey color tick mark – indicates that the Business Flow is download from the repository
The red color pen icon- indicates that the Business flow has changes in it which are not been uploaded to the repository.
Source Control File Status Tracking Icons
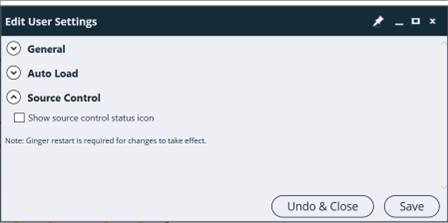
To Enable/Disable source control file status tracking icon, click on the user icon on the top right corner of Ginger window and click on ‘User Settings’ menu item.
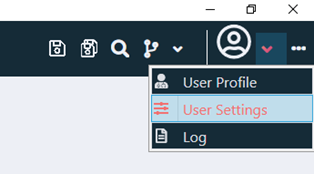
Expand the ‘Source Control’ options and Check/Uncheck to Enable/Disable source control file status tracking.